Make a donation

Author Topic: Mandy's Rising Blue Golf R  (Read 6573 times)

Offline xjay1337

  • Just look at my post count
  • ******
  • Thank You
  • -Given: 15
  • -Receive: 377
  • Posts: 4916
  • My Ride: http://www.mk5golfgti.co.uk/forum/index.php/topic,88399.0.html
Mandy's Rising Blue Golf R
« on: April 27, 2014, 07:56:55 pm »
As part of the special offer that Nick and myself run for this forum

www.mk5golfgti.co.uk/forum/index.php/topic,80983

We were very excited to get Mandy's lovely Golf R in for a long days work.

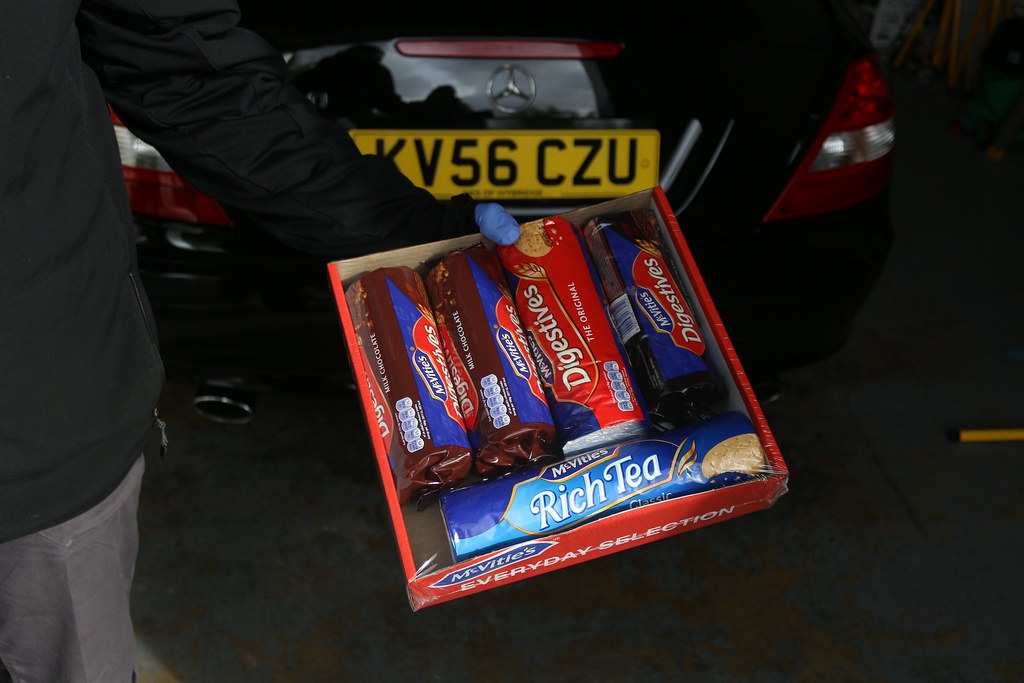
Mandy was so very kind to bring us a massive box of biscuits, which definitely kept us going through the 15+ hour day. It's very rare we get given little treats like this so was really kind, and will keep us well fed for many weeks to come, haha.

IMG_4655 by Fat Bear Photography, on Flickr


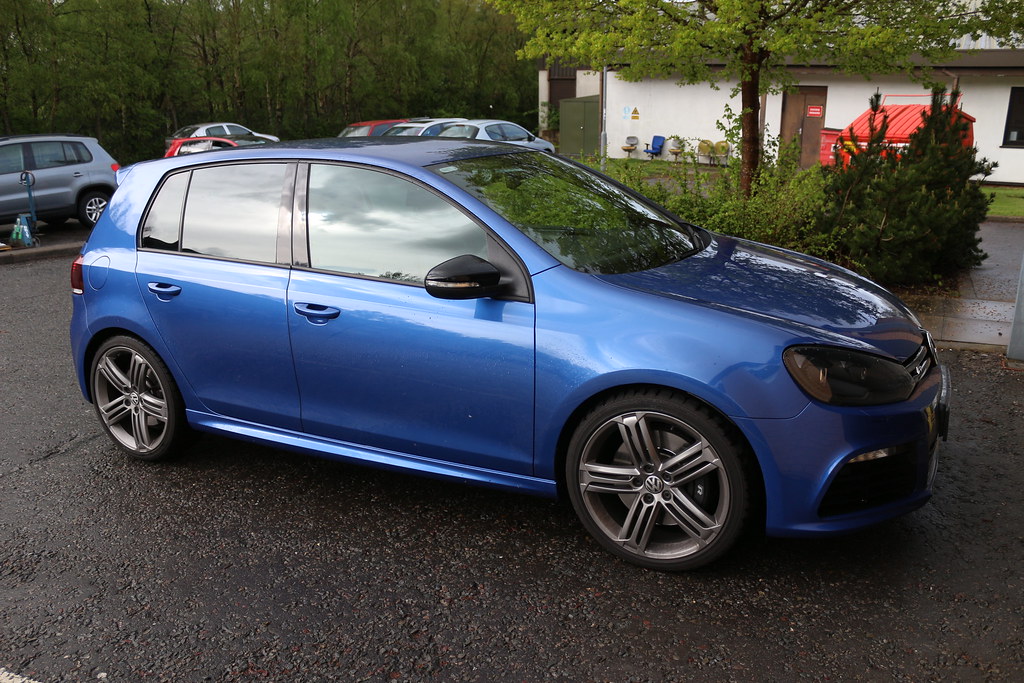
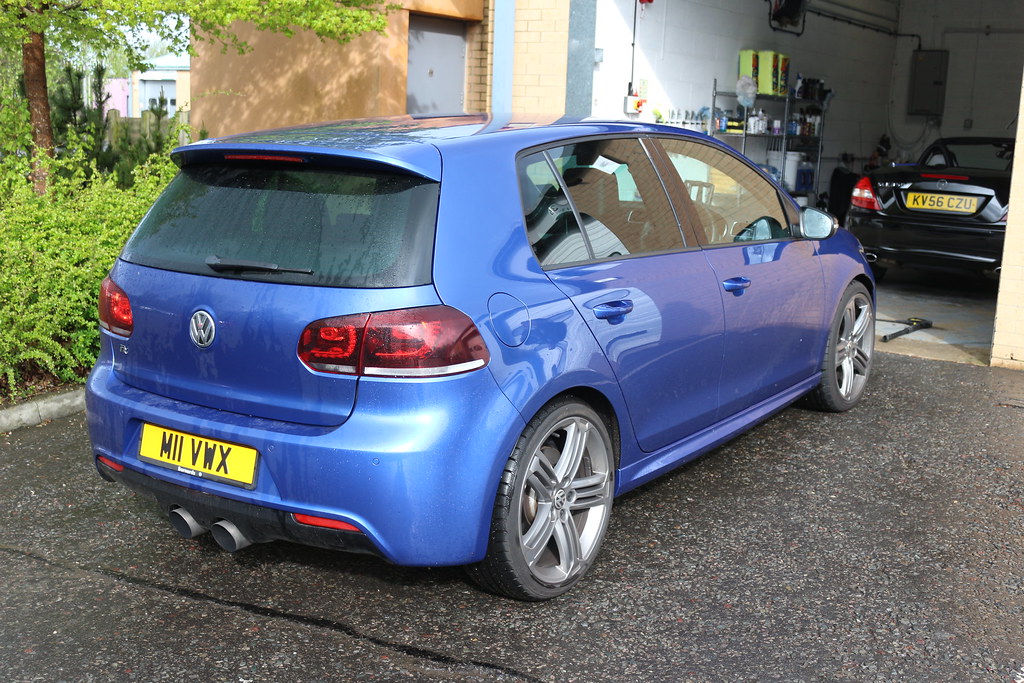
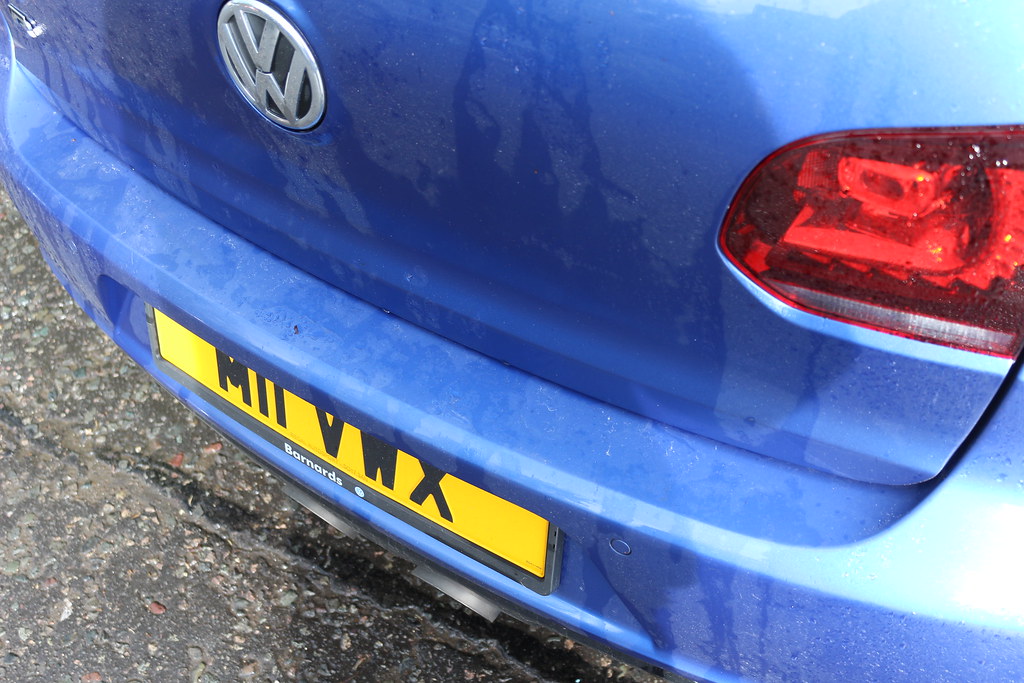
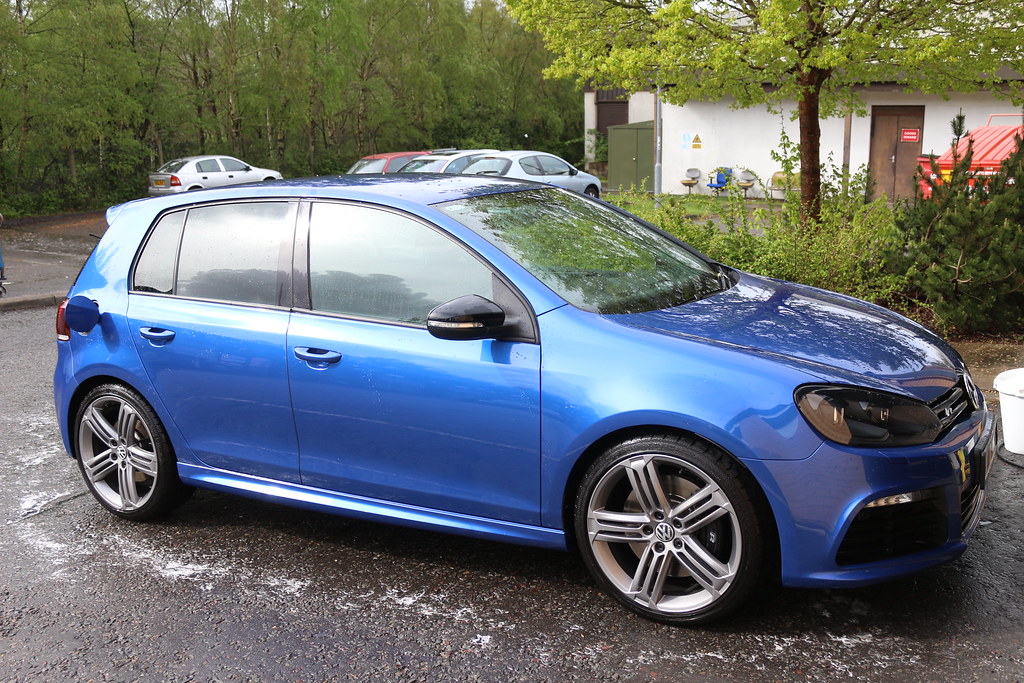
Anyway, all fun aside here's how the car was delivered to us at around 8:45am :)

IMG_4641 by Fat Bear Photography, on Flickr

IMG_4643 by Fat Bear Photography, on Flickr

IMG_4646 by Fat Bear Photography, on Flickr

IMG_4650 by Fat Bear Photography, on Flickr


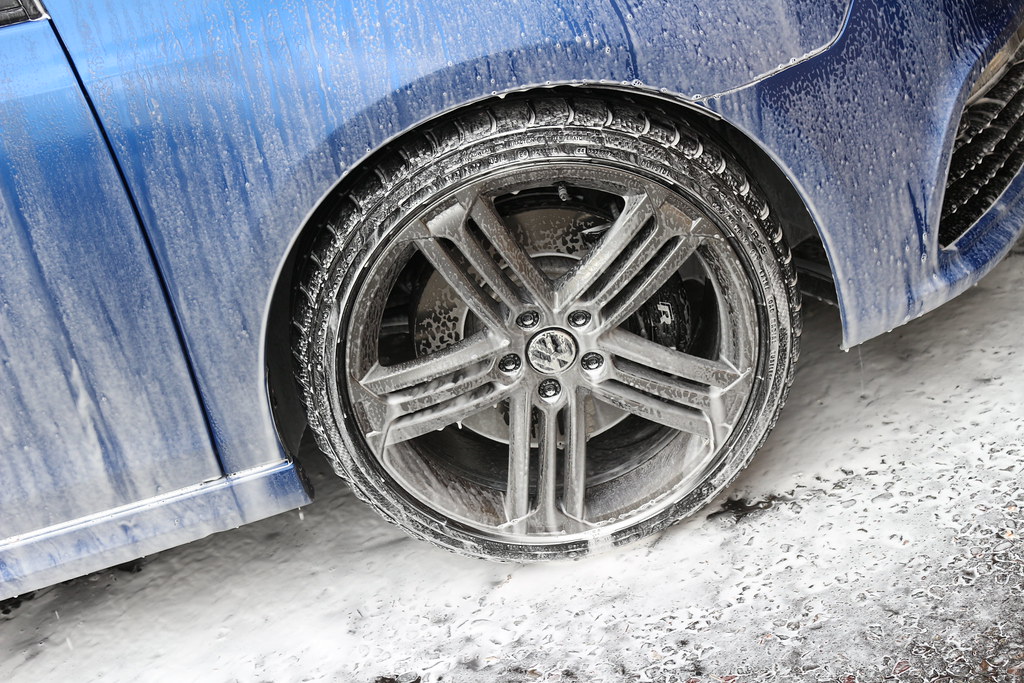
So definitely in need of a good wash!


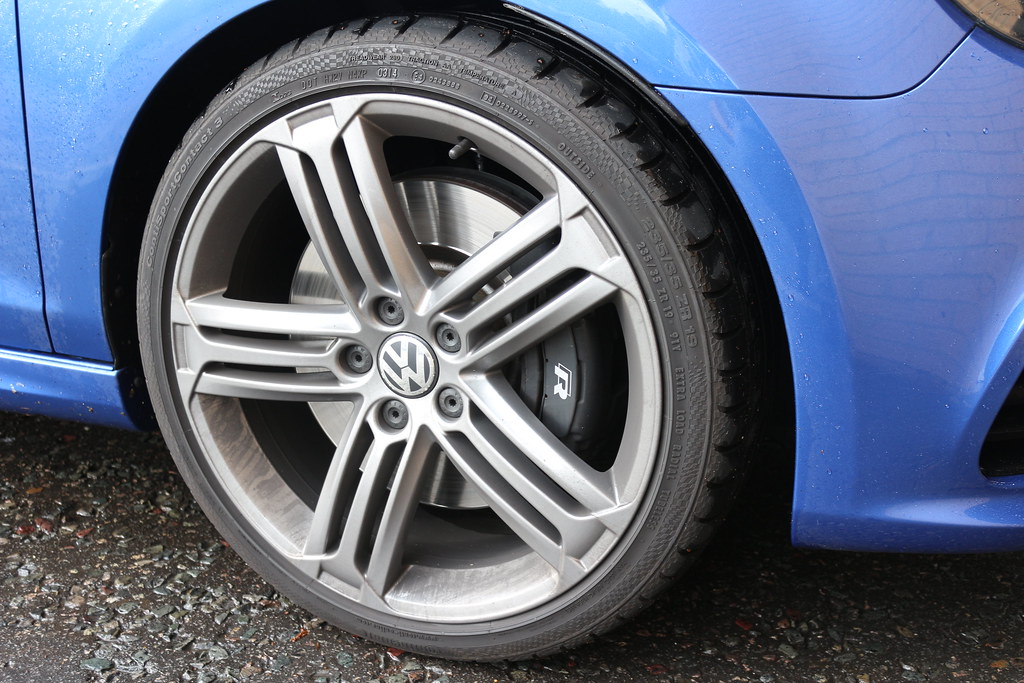
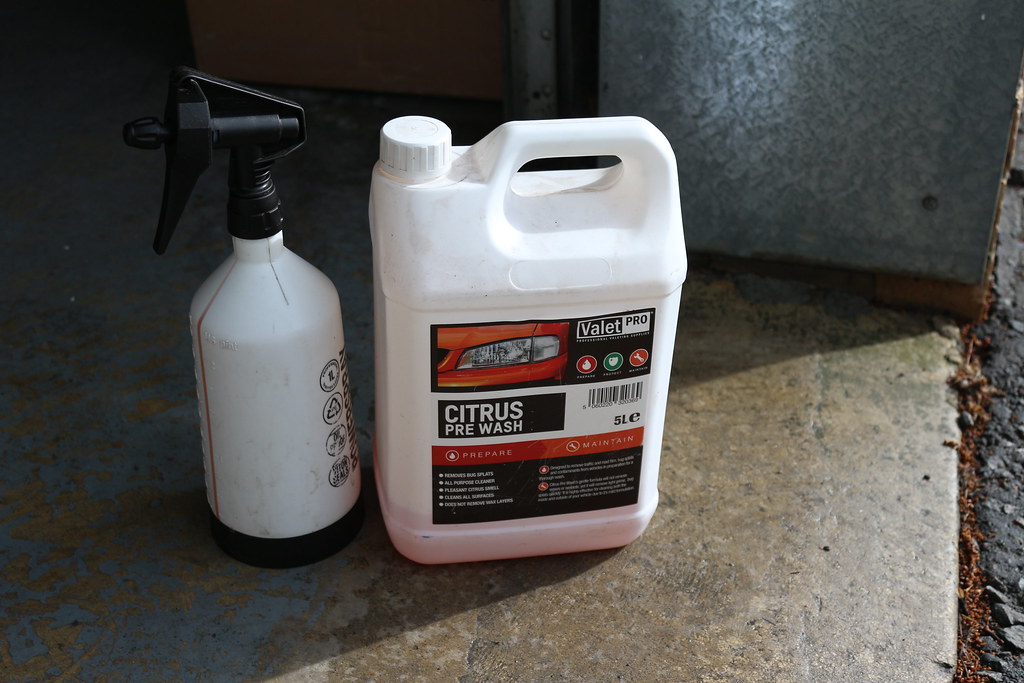
For this we used Valet Pro Citrus Prewash sprayed liberally onto the wheels and lower panels of the car, using a dual action sprayer and then jetted it off (the wheels only) revealing a wheel 90% clean, as the wheels have recently been refurbished in a lovely anthracite colour which really matches the car.

IMG_4654 by Fat Bear Photography, on Flickr

IMG_4657 by Fat Bear Photography, on Flickr


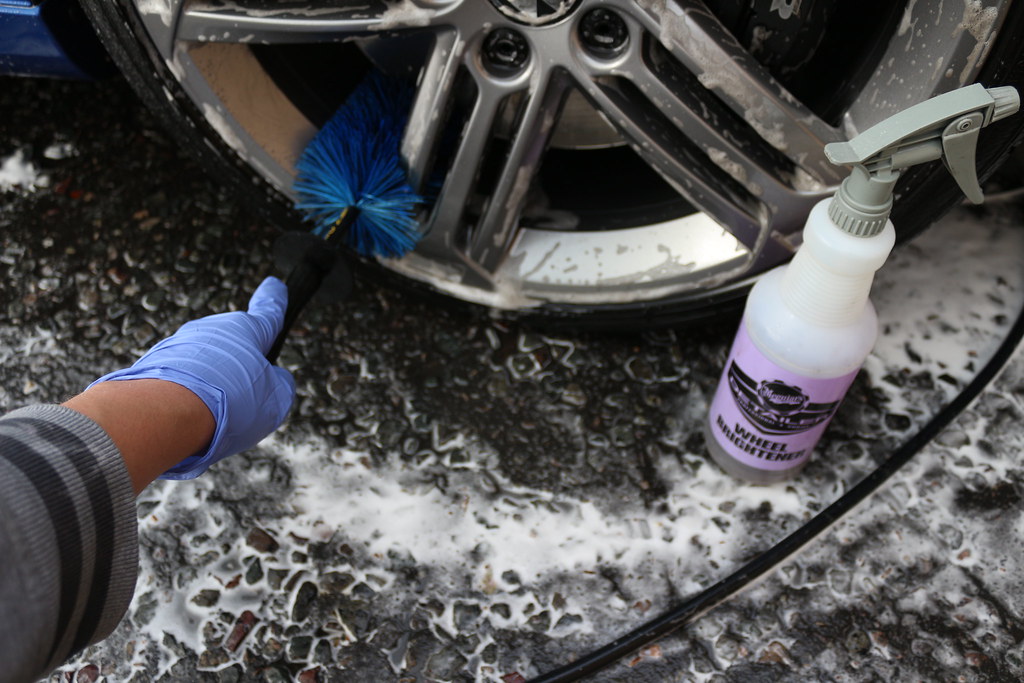
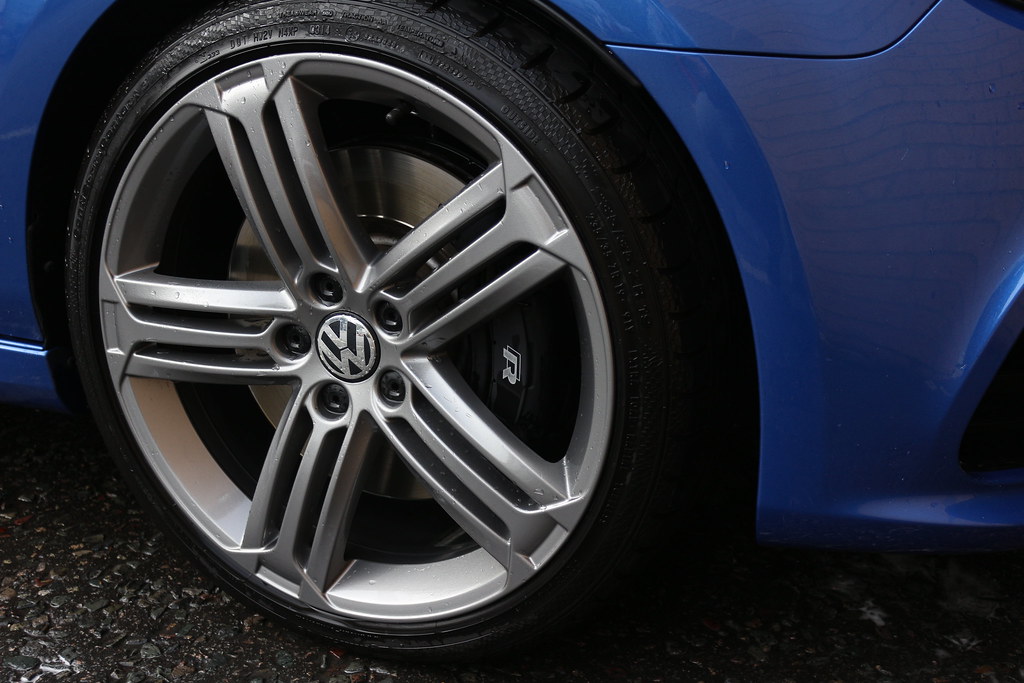
To get them spotless, Meguiars Wheel Brightner was used at a low dilution ratio
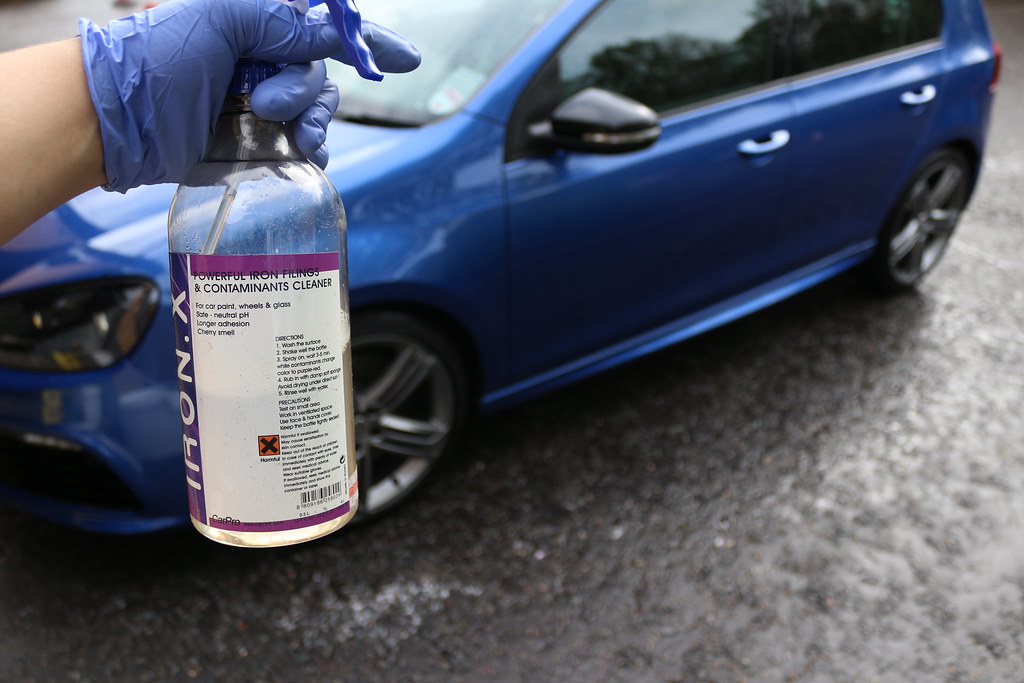
Meguiars sidelock brushes and EZ-Detail wheel brushes were also used to get all the way to the back of the barrel. The arches were cleaned using APC, wheel cleaner and various wheel woolies, and Iron X was also applied to the wheels to remove bonded iron contamination.

IMG_4671 by Fat Bear Photography, on Flickr

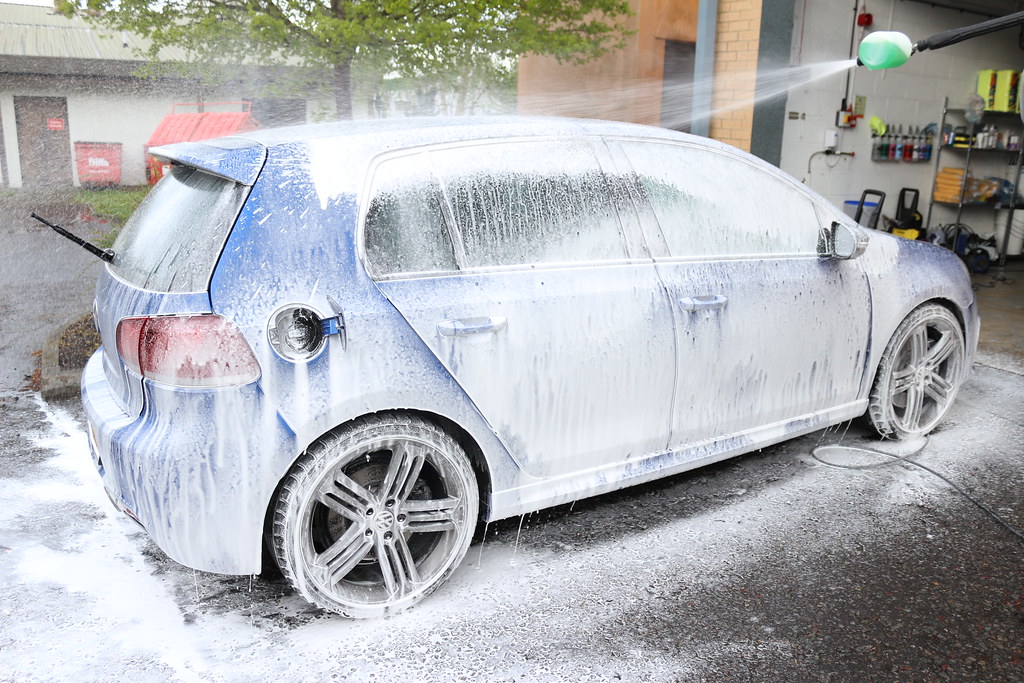
While I was getting on with this Nick coated the car with Bilt Hamber Autofoam to loosen off the dirt prior to being washed with the usual 2 bucket method with DMC Ultra Gloss Shampoo and DMC's lambswool wash mitt.


IMG_4667 by Fat Bear Photography, on Flickr

IMG_4669 by Fat Bear Photography, on Flickr

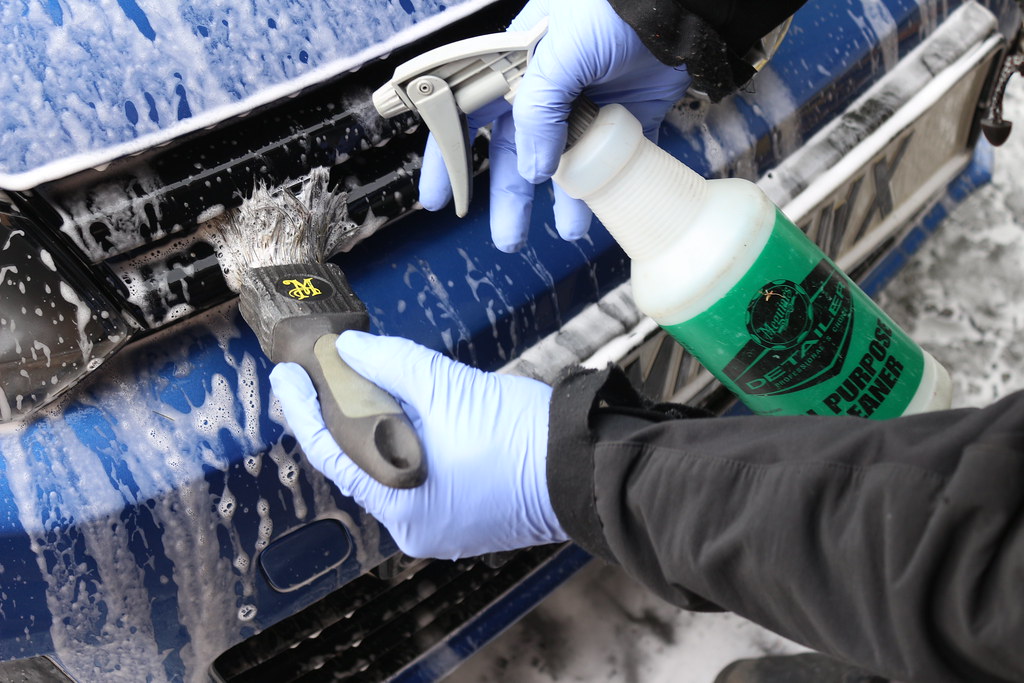
While the Autofoam was doing it's job Nick went round the car with another Megs Sidelock brush and some diluted APC cleaning off the grills, door rubbers, fuel cap, etc.

IMG_4670 by Fat Bear Photography, on Flickr


After washing:


IMG_4674 by Fat Bear Photography, on Flickr


IMG_4673 by Fat Bear Photography, on Flickr

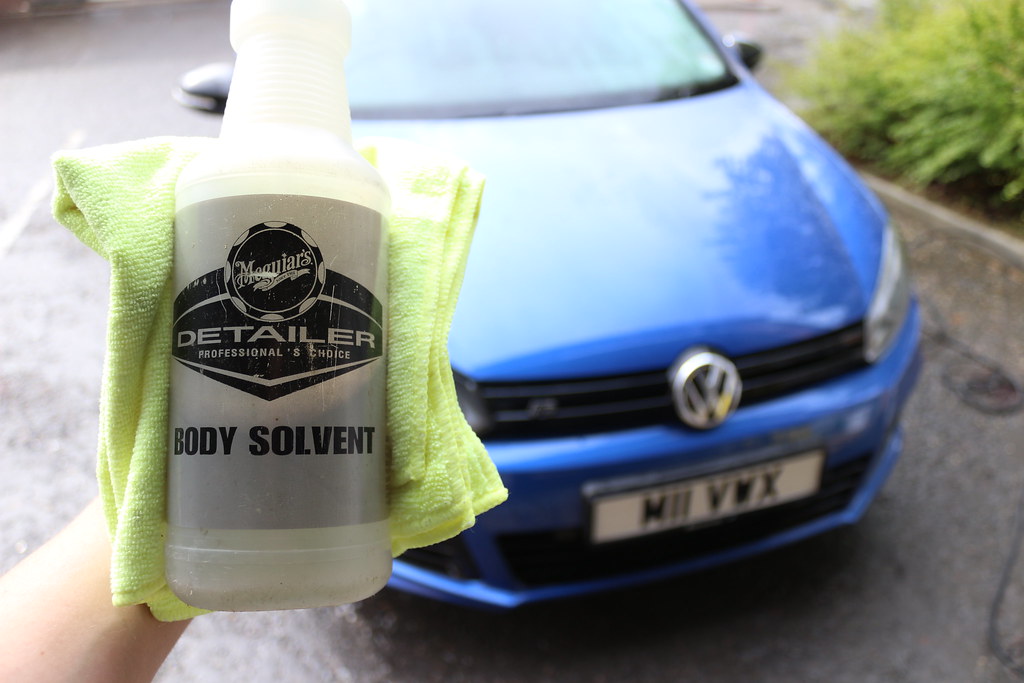
After this step we began decontamination of the paintwork -  Iron X was applied to the whole vehicle and then rinsed, after that Autosmart Tardis (in the Body solvent bottle) was used on the lower halfs of the car and any tar spots were wiped away with a microfibre towel and then the car was jetted off thoroughly to remove any left over product from the surface.
 

IMG_4677 by Fat Bear Photography, on Flickr

IMG_4678 by Fat Bear Photography, on Flickr

IMG_4679 by Fat Bear Photography, on Flickr

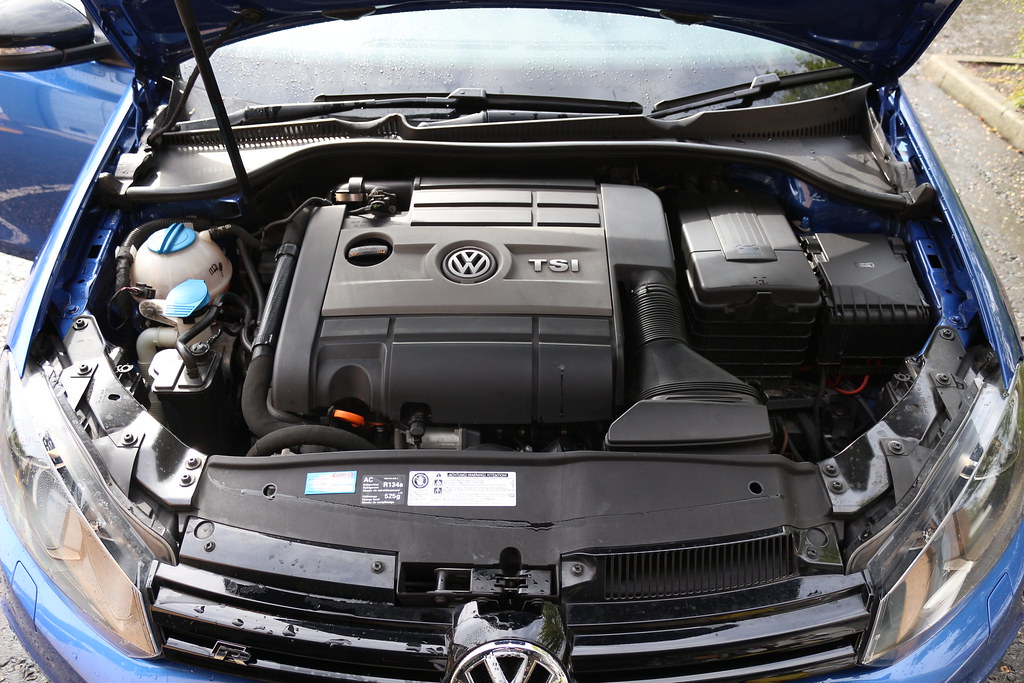
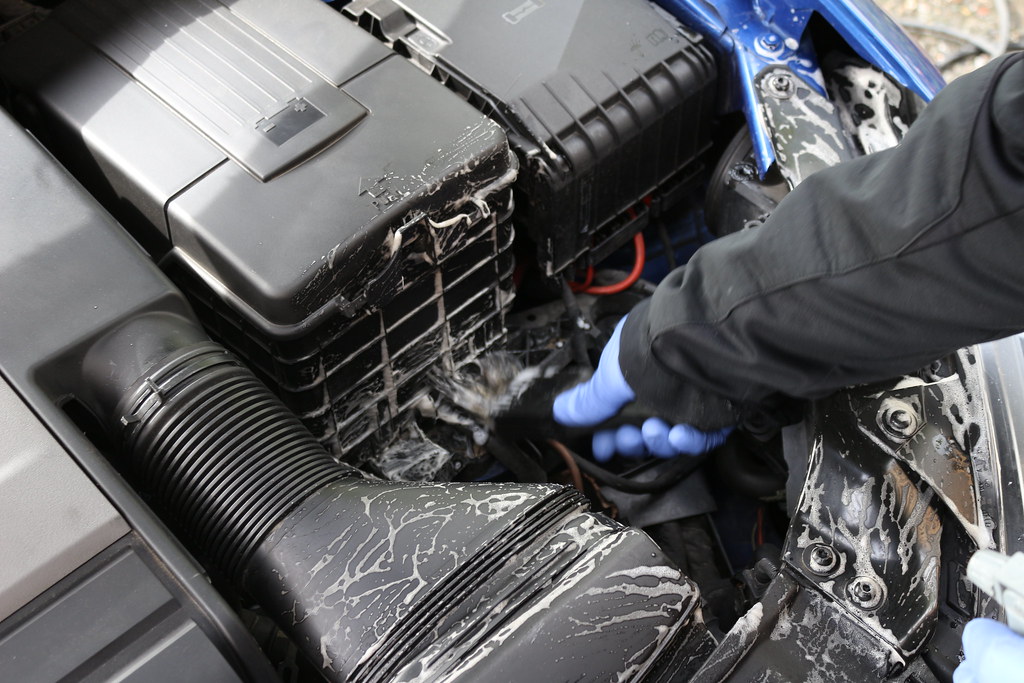
The engine bay was cleaned at this stage as well, using APC and a variety of brushes, before being carefully jetted off and dried, with a durable protective coating applied.

IMG_4683 by Fat Bear Photography, on Flickr

IMG_4686 by Fat Bear Photography, on Flickr

IMG_4688 by Fat Bear Photography, on Flickr

The car was now dried using Uber XL Microfibre drying towels and the crevices blown out using a heated electric pet drier and taken into the unit to begin inspections and taping up the car ready for polishing.

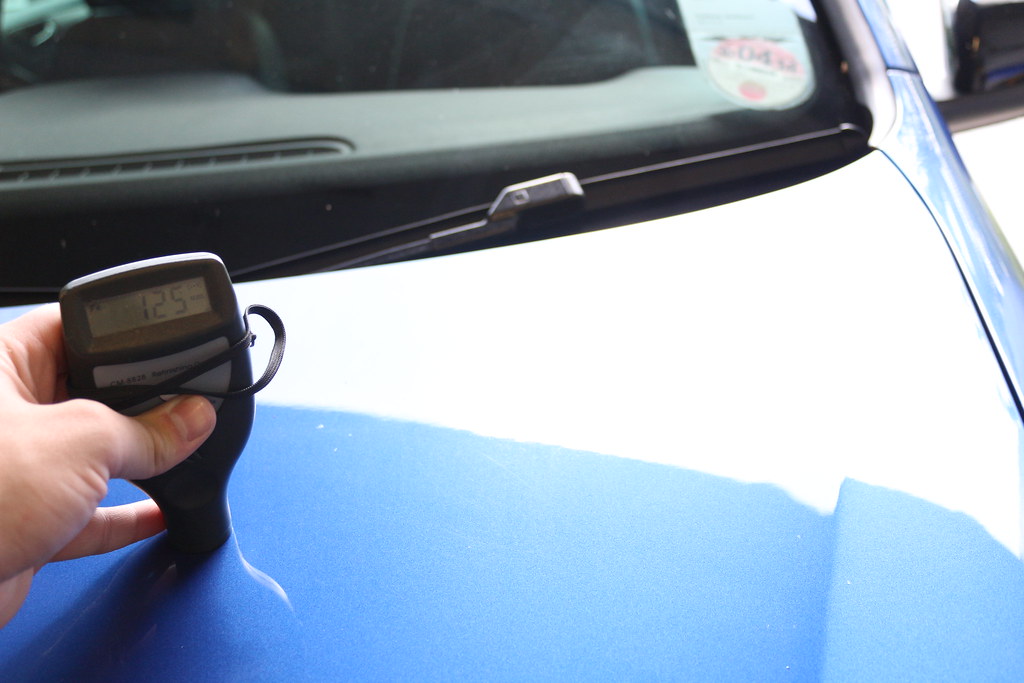
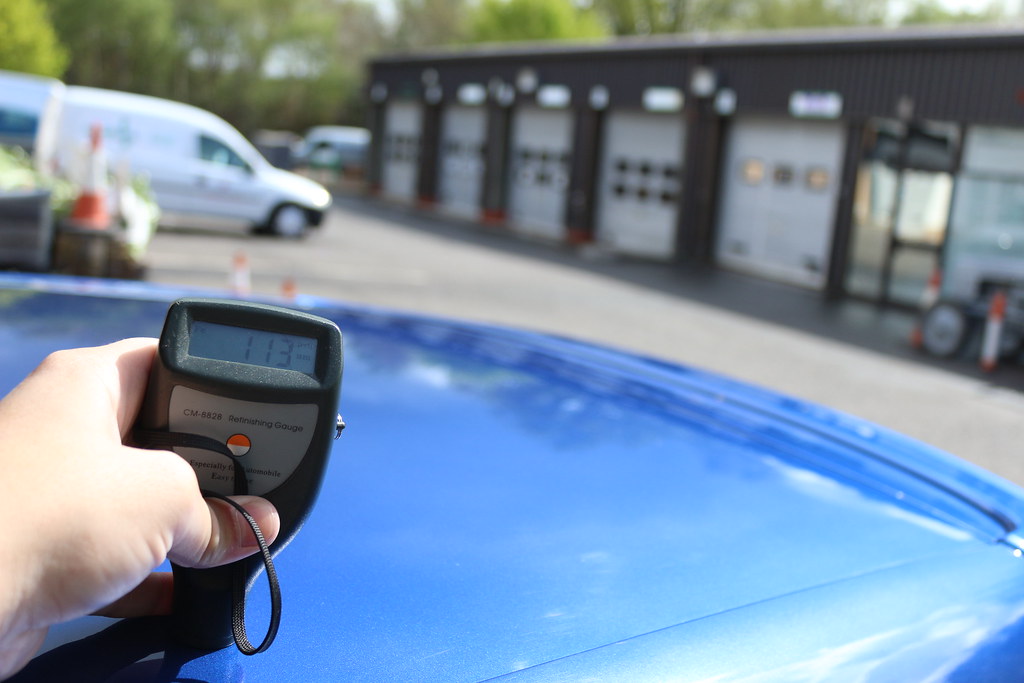
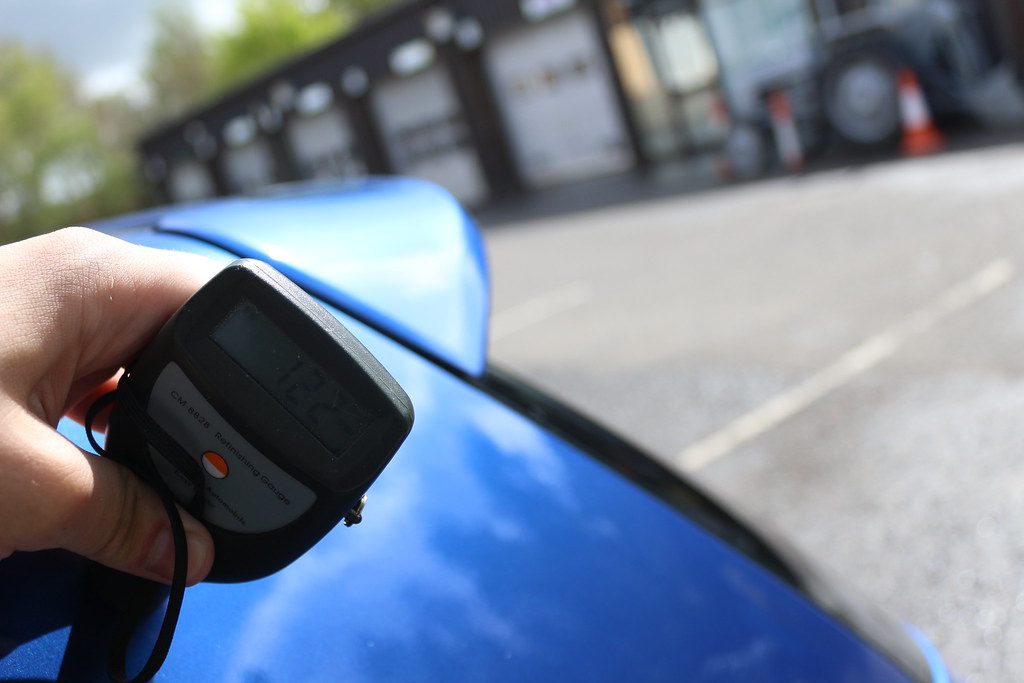
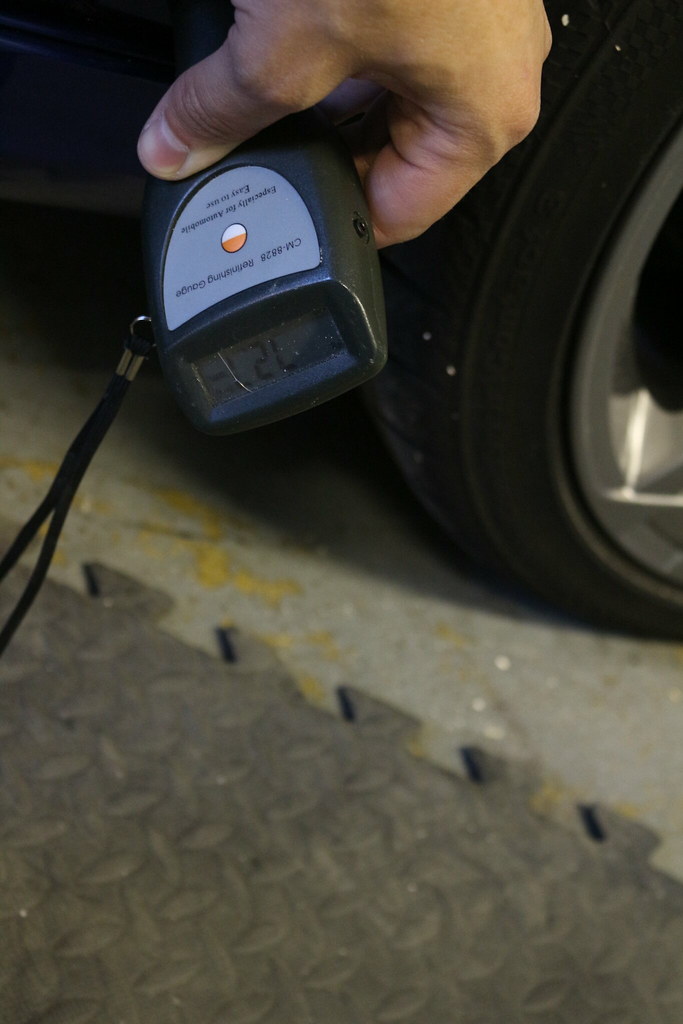
Before any polishing work commended the car was given a good check over using the paint depth gauge to measure remaining clearcoat.

IMG_4726 by Fat Bear Photography, on Flickr

IMG_4733 by Fat Bear Photography, on Flickr

IMG_4737 by Fat Bear Photography, on Flickr

IMG_4734 by Fat Bear Photography, on Flickr


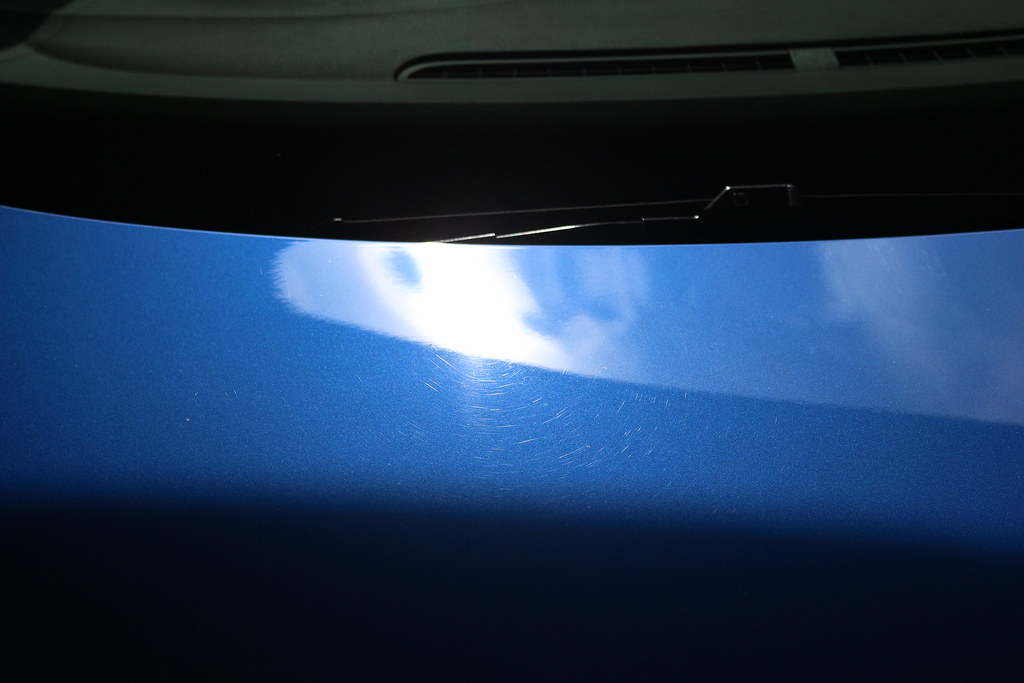
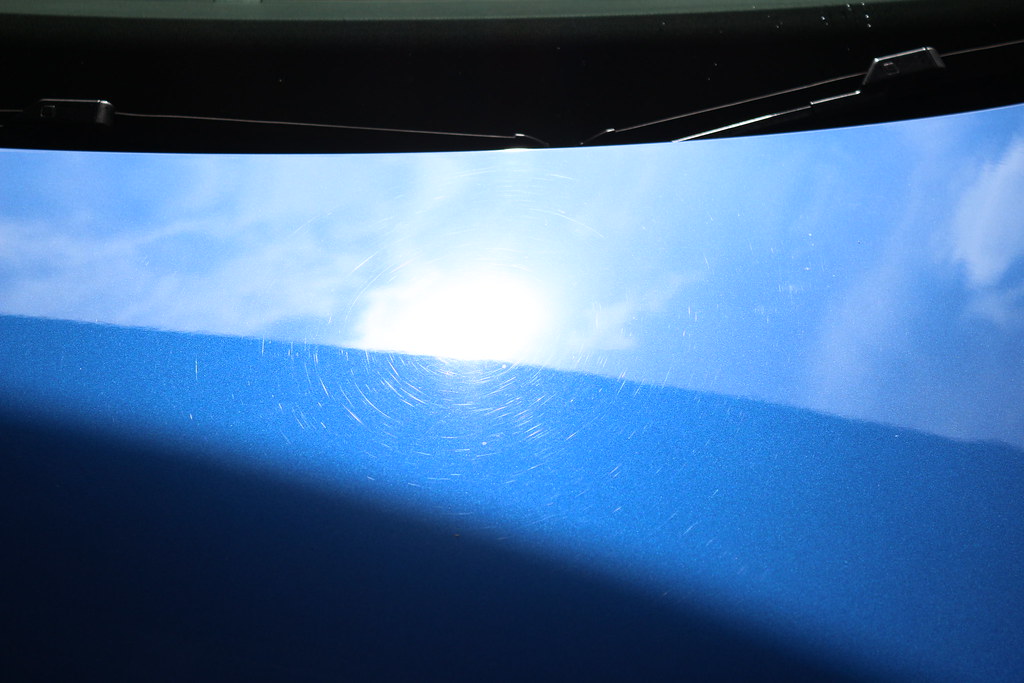
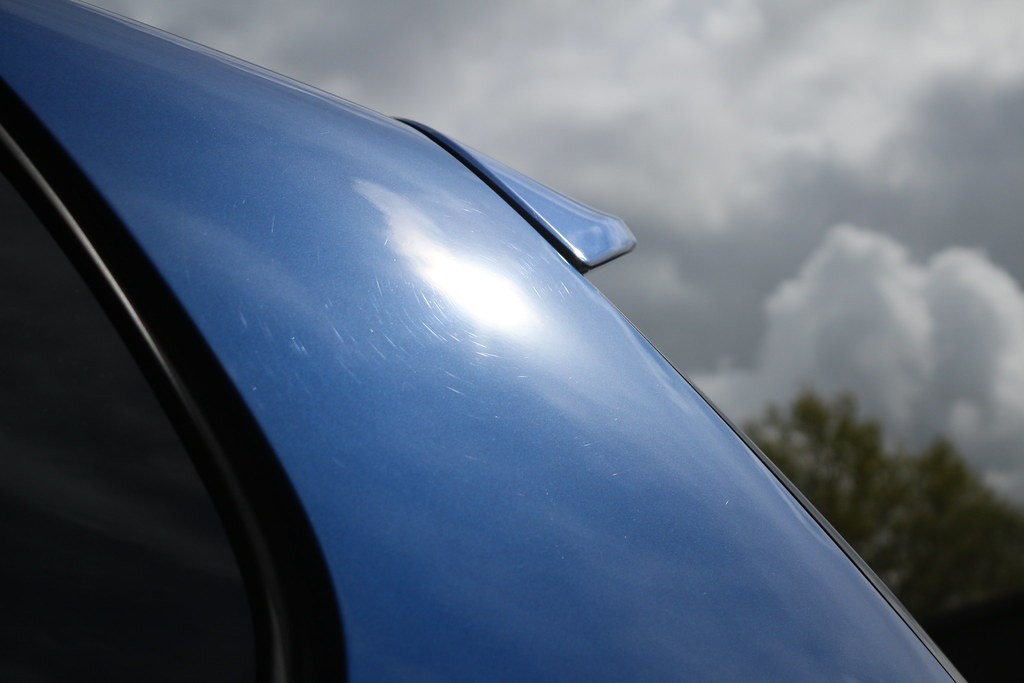
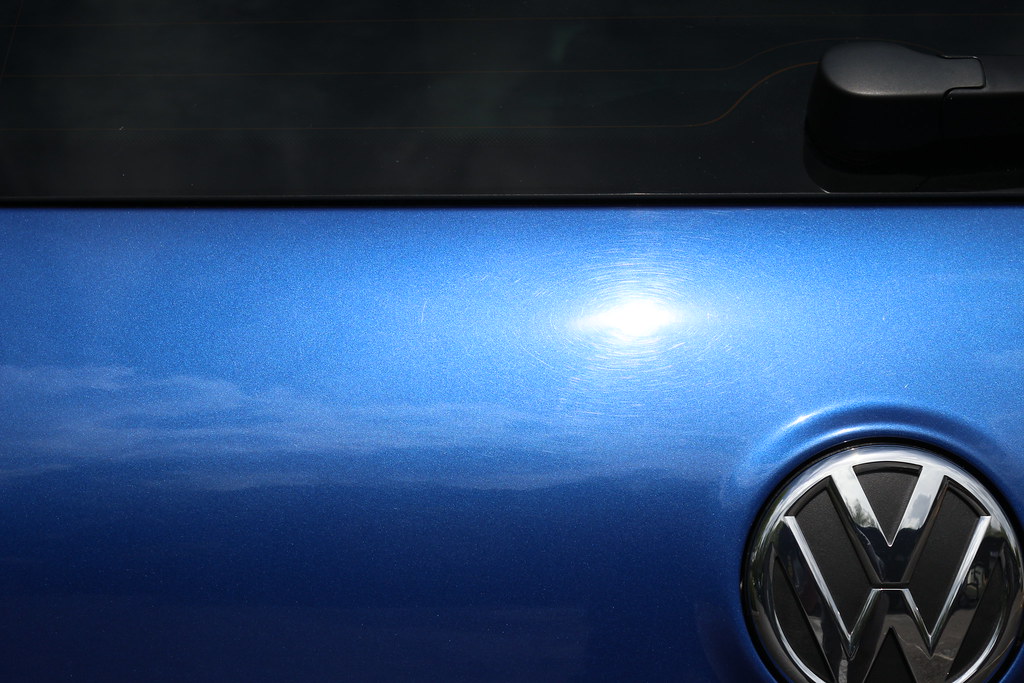
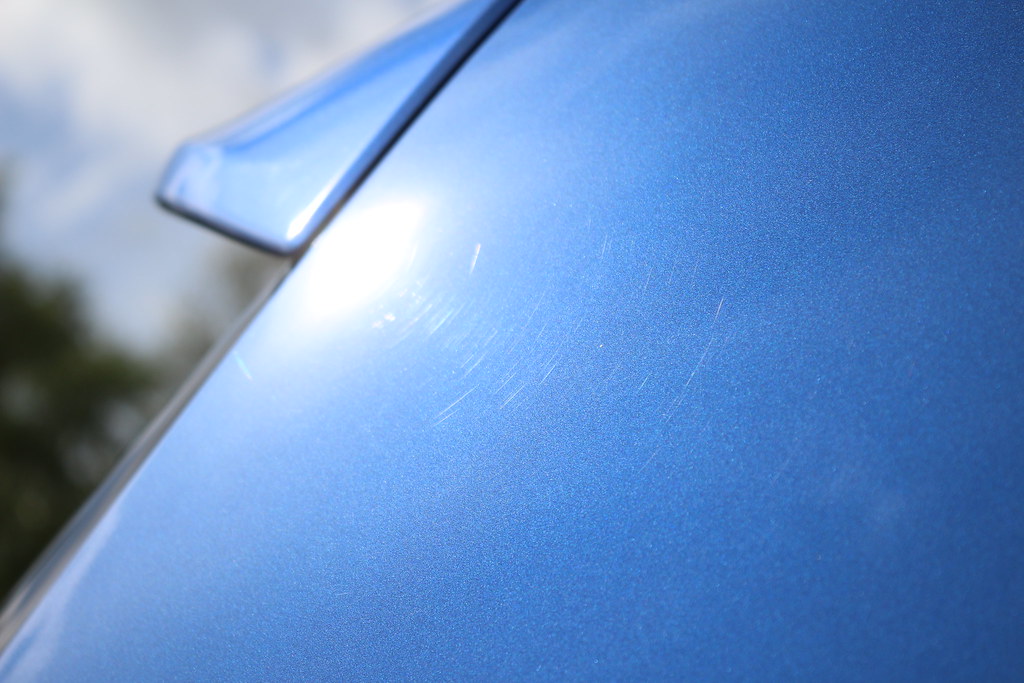
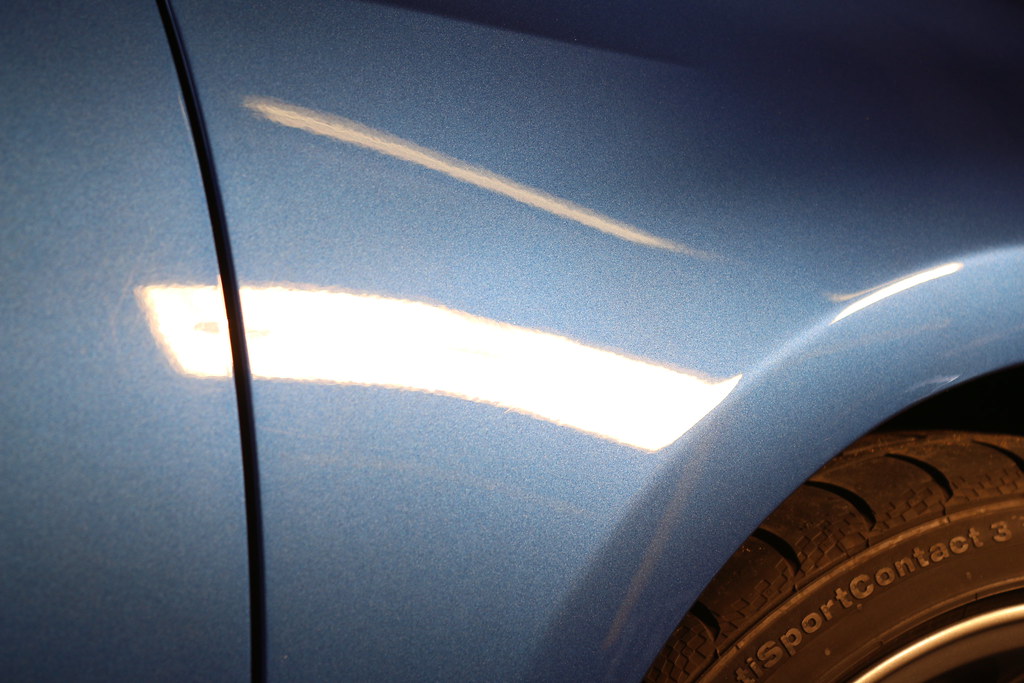
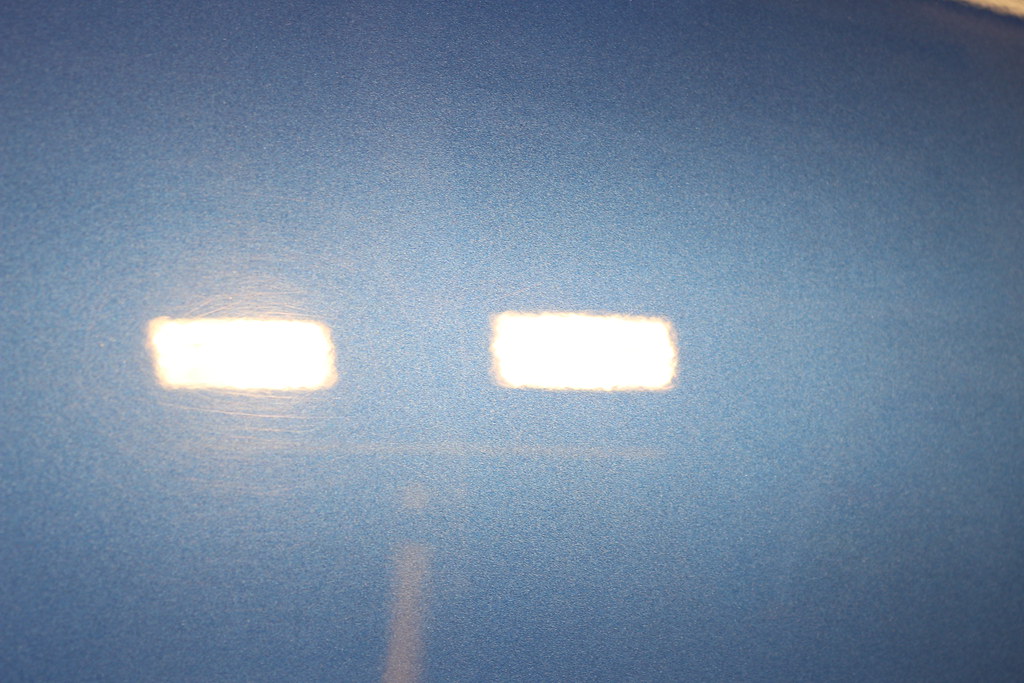
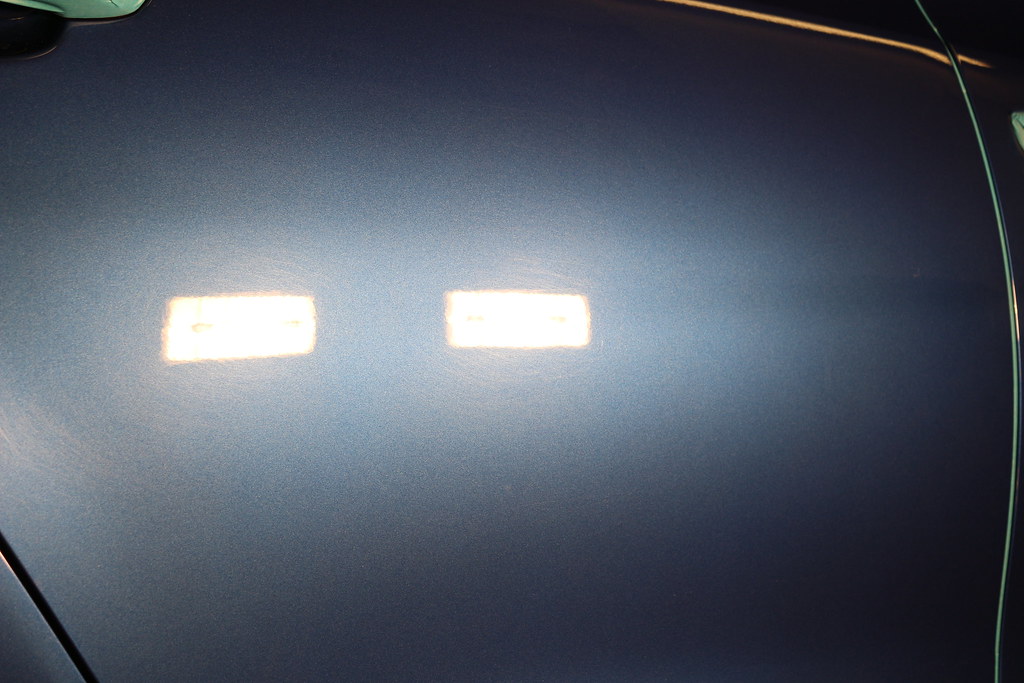
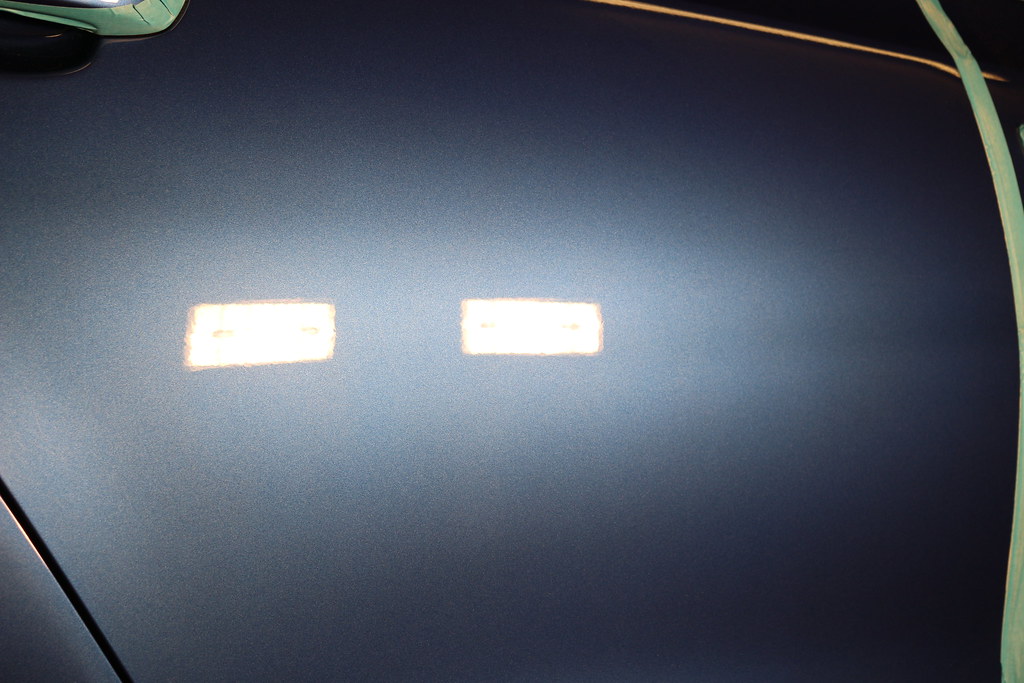
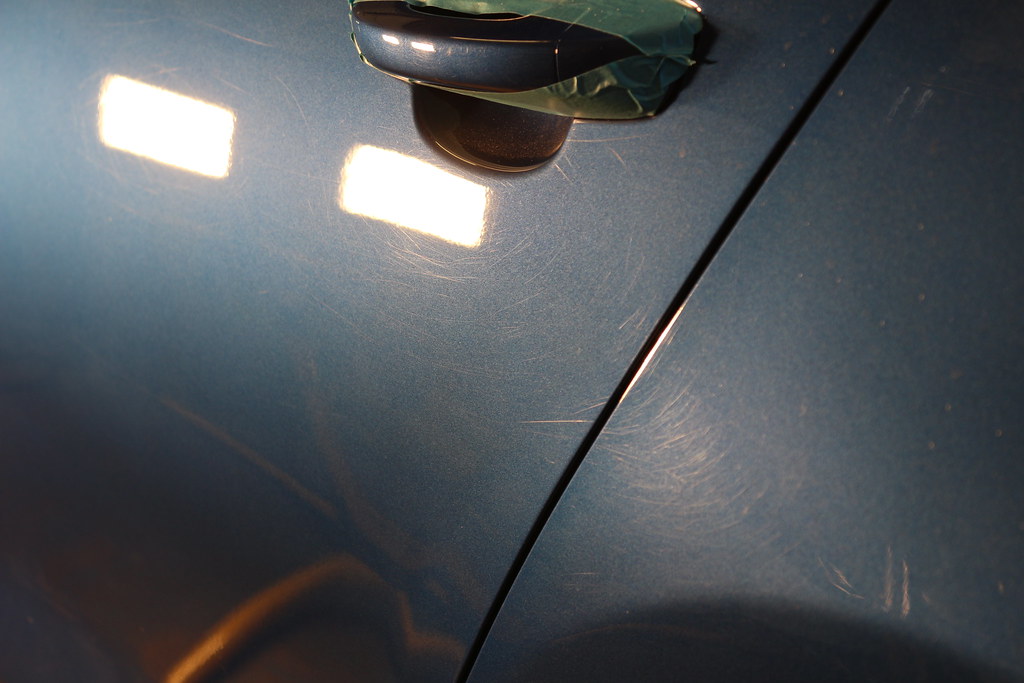
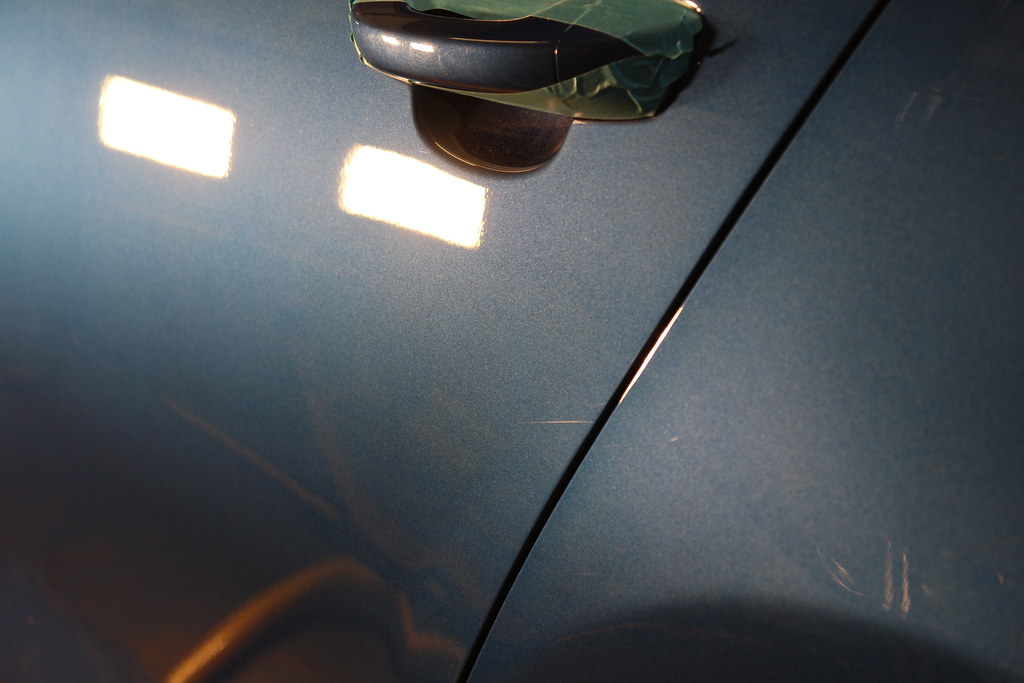
After a visual check of the car with Brinkman LED & Halogen lights , there were several deeper scratches on certain panels, mainly the rear passenger side wing and the roof which suffered from some seriously heavy and deep swirling.

Some just under what little sunlight we could get throughout the day of heavy showers!!

IMG_4741 by Fat Bear Photography, on Flickr

IMG_4746 by Fat Bear Photography, on Flickr

IMG_4753 by Fat Bear Photography, on Flickr

IMG_4756 by Fat Bear Photography, on Flickr

IMG_4758 by Fat Bear Photography, on Flickr

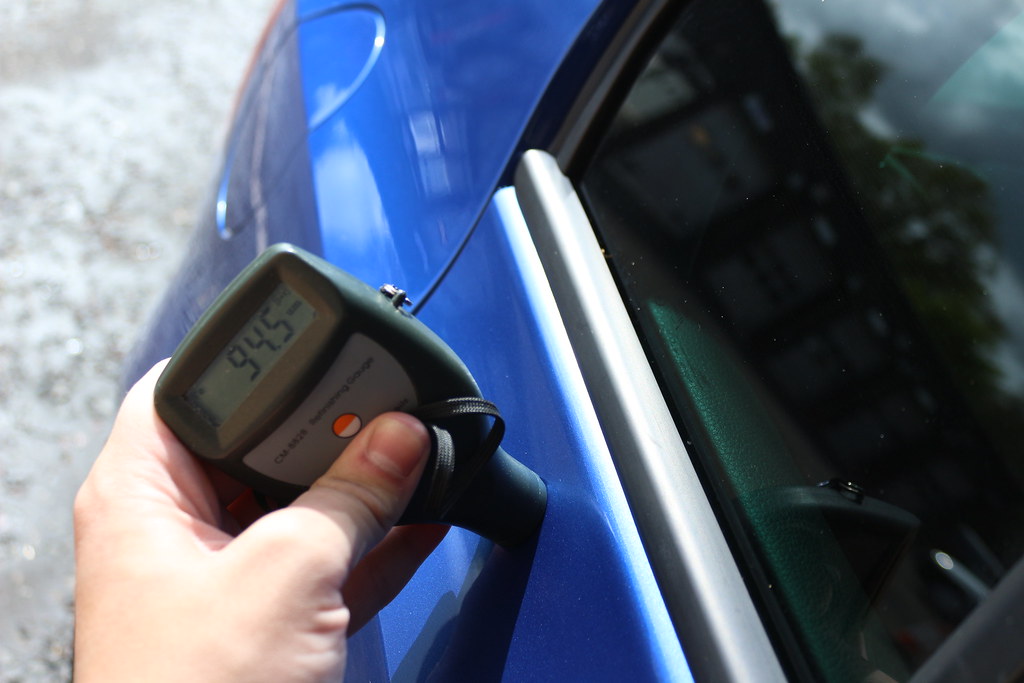
Generally healthy levels of paint depth were measured as expected for a VAG model however there were some areas of concern, especially on the lower half of the drivers side wing which in places was reading as low as 71 microns of paint!!!! I was surprised there was any clearcoat left!!

IMG_4817 by Fat Bear Photography, on Flickr

This area of low paint readings carried on about half way along the drivers door, under the lower swage line - To avoid any possible strike through to these areas the areas were completely taped up and not corrected (they would later be given a very light polish as part of the refinement process).


Polishing began with Nick and I taking a side each and working along the car.

As typical with German paint, and similar to a Mk6 GTI that Nick has done in the past, the paint was incredibly hard meaning that swirlmarks take multiple passes to achieve a good 85% defect removal rate.

Please note all of the after shots are taken after an IPA wipedown but BEFORE refinement, as we correct the car first and then refine it after removing the dust. Just makes tidying up easier and means any minor marks inflicting by removing the dust if you were really unlucky, can be easily removed. Some of the defects are hard to photograph!


Drivers side wing:

Before

IMG_4763 by Fat Bear Photography, on Flickr


After
IMG_4768 by Fat Bear Photography, on Flickr


Drivers door 50/50, left hand side uncorrected right hand side corrected.

IMG_4775 by Fat Bear Photography, on Flickr

Rear drivers side door before:

IMG_4782 by Fat Bear Photography, on Flickr

and after

IMG_4787 by Fat Bear Photography, on Flickr


Rear passenger 3/4 panel  before:

IMG_4791 by Fat Bear Photography, on Flickr

and after

IMG_4793 by Fat Bear Photography, on Flickr

Offline xjay1337

  • Just look at my post count
  • ******
  • Thank You
  • -Given: 15
  • -Receive: 377
  • Posts: 4916
  • My Ride: http://www.mk5golfgti.co.uk/forum/index.php/topic,88399.0.html
Re: Mandy's Rising Blue Golf R
« Reply #1 on: April 27, 2014, 07:57:32 pm »
The B pillars always mark while washing, so these were given a once over as well.

IMG_4796 by Fat Bear Photography, on Flickr

IMG_4799 by Fat Bear Photography, on Flickr

Boot before

IMG_4801 by Fat Bear Photography, on Flickr

and after

IMG_4803 by Fat Bear Photography, on Flickr

Even the rear lights got some attention.

Before and afters.

IMG_4808 by Fat Bear Photography, on Flickr

IMG_4809 by Fat Bear Photography, on Flickr

The fronts were also given a once over but these were not as bad, so no pictures were taken.

Polishing using heavy abrasives, as called for by the type of paint, create a lot of dust which gets everywhere!

IMG_4814 by Fat Bear Photography, on Flickr

IMG_4815 by Fat Bear Photography, on Flickr

So the car was taken outside to remove all of the polishing dust prior to refining.

IMG_4819 by Fat Bear Photography, on Flickr

To avoid inflicting any more marks the washing and drying process are done in as much of a "hands off" manner as possible.

The vehicle was blow dried completely using the heated electric air blower.


IMG_4827 by Fat Bear Photography, on Flickr

IMG_4823 by Fat Bear Photography, on Flickr

While the car was outside the exhausts were given a polish, left one cleaned.

IMG_4837 by Fat Bear Photography, on Flickr

Nick started refining and I began working on the interior.

The interior before:

IMG_4839 by Fat Bear Photography, on Flickr


It looks a bit muddy from the winter-mats but was overall pretty clean, and smelt lovely already with copious amounts of cali-car scents  :star:

All of the mats were removed from the vehicle and the entire interior was hoovered out, with the carpets cleaned with an interior shampoo and agitated with a brush before being hoovered once more to remove any freshly released dirt, with the leather given cleaned and protected with 303 Aerospace protectant.

The rubber floor mats were originally given a good scrub down with some interior shampoo

IMG_4841 by Fat Bear Photography, on Flickr

However they were heavily soiled so decided to take them outside and clean them with a hi cleaning power foaming agent and a brush, no pictures of this as it because it was dark and raining!!
They were brought back inside the unit, dried once again using the electric hot air blower and given a coating of 303 Aerospace Protectant.

IMG_4871 by Fat Bear Photography, on Flickr

After the interior was finished I picked up the polisher once again to continue with the refinement and following a thorough IPA wipedown the car was now ready for it's LSP, chosen to be a couple of coats of FK1000p for it's durability and good protective qualities

IMG_4842 by Fat Bear Photography, on Flickr

Curing:

IMG_4843 by Fat Bear Photography, on Flickr

IMG_4844 by Fat Bear Photography, on Flickr

Once the wax was removed the vehicle was given a final wipe down using FK #425 quick detail spray

IMG_4845 by Fat Bear Photography, on Flickr


Tyres were dressed with Pinnacle tyre dressing and wheels were given a final wipe down as well.
Glass was cleaned inside and out using Surf City Glass Cleaner
Door shuts were wiped down with FK #425 .


Leaving the finished pictures!

IMG_4846 by Fat Bear Photography, on Flickr

IMG_4849 by Fat Bear Photography, on Flickr

IMG_4852 by Fat Bear Photography, on Flickr

IMG_4862-2 by Fat Bear Photography, on Flickr

IMG_4863 by Fat Bear Photography, on Flickr

IMG_4865 by Fat Bear Photography, on Flickr

IMG_4868 by Fat Bear Photography, on Flickr

IMG_4866 by Fat Bear Photography, on Flickr


Thanks for sticking with us if you made it this far.

Polishers used were made by 3M and Flex.
A variety of pads were used, Lake County, Microfibre Pads, Wool pads, Liquid Elements, Chemical Guys
Polishes used were again a variety, Scholl S40,  S17+, S3 Gold, S2 Orange, 3fm Fast cut ( :sick:), Meguiars 105 and 101 among others!!

Between Nick and myself there are over 30 man hours on this car all completed between us. We left the unit at gone midnight after a long days work but it was well worth it to see the transformation the car went through
 
A lovely, lovely, lovely car, now I really want one :(


« Last Edit: April 27, 2014, 08:03:53 pm by xjay1337 »

Offline RoMocop

  • Always Involved
  • ****
  • Thank You
  • -Given: 27
  • -Receive: 6
  • Posts: 297
    • Email
Re: Mandy's Rising Blue Golf R
« Reply #2 on: April 27, 2014, 09:30:34 pm »
Really big thank you to you and Nick for your hard work and effort. The results are amazing I can't believe how much you got done in a day! We are really chuffed with it and wouldn't hesitate using you again. Got some great after care advice from Nick too which I will try my best to follow. :happy2: :notworthy:

 Revo | S3 Front Brakes| VCDS (Don't know how to use :laugh:)

Also. Golf R, Rising Blue, DSG, Leather, 19" Tallys, RVC, RNS510 DAB, F+R Park Sensors, Hill Hold, CC, DynoAudio, H&R ARBs, Milltek Non-Res CatBack, Garage Vary Carbon Fibre Lip.

Offline xjay1337

  • Just look at my post count
  • ******
  • Thank You
  • -Given: 15
  • -Receive: 377
  • Posts: 4916
  • My Ride: http://www.mk5golfgti.co.uk/forum/index.php/topic,88399.0.html
Re: Mandy's Rising Blue Golf R
« Reply #3 on: April 27, 2014, 10:48:58 pm »
No worries at all, thank you for letting us work on the beast. What a lovely car. Nick could tell you how much I kept saying I really want to buy one haha. Sorry about the weather when you collected it, always the way!

Really appreciate the kind words it makes the job all the more worthwhile  :congrats: :drinking:

Was also great to meet both you and Mandy - come along to one of the forum dinners whenever they're organised again, aha

Offline Mandy

  • Just look at my post count
  • ******
  • Thank You
  • -Given: 95
  • -Receive: 94
  • Posts: 1701
  • Drink Russian, Wear Italian, Drive German :)
Re: Mandy's Rising Blue Golf R
« Reply #4 on: April 28, 2014, 03:12:56 pm »
Hi Jay, thank you for doing this write up, it really shows just how much work you and Nick have put into it to make the car look so good. I knew there were a lot of swirl marks when we first picked up the car, your before photos show just how bad they actually were! The difference was night and day between when we dropped the car off to you and when we picked it up the following day, the Rising Blue paint is a true beauty now (or when the sun's out). It's amazing how much the pair of you managed to achieve in a relatively short space of time, considering the paint is quite hard and not the easiest to work with. It was great to meet you and Nick by the way. :happy2:

Great job guys, really am impressed with the results! :notworthy: :congrats: :pomppomp: :love: :happy2:
................................................
Driving: Tornado Red MK7 GTD, BMW 330e
Drove: Rising Blue Golf 6R, Reflex Silver Edition30 No.1684, Tornado Red Mk5 Golf GTI

Offline doylebros

  • Just look at my post count
  • ******
  • Thank You
  • -Given: 44
  • -Receive: 309
  • Posts: 2774
Re: Mandy's Rising Blue Golf R
« Reply #5 on: April 28, 2014, 07:40:06 pm »
Wow, I don't think "my body" never mind the car, has ever had such care and attention given to it, in fact I'm sure when I've been in hospital they've never shown that type of detailed care!
Lovely Job  :congrats:

Offline toosmiles

  • Won't Shut up.
  • *****
  • Thank You
  • -Given: 22
  • -Receive: 18
  • Posts: 635
    • Email
  • My Ride: http://www.mk5golfgti.co.uk/forum/index.php/topic,92286.0.html
Re: Mandy's Rising Blue Golf R
« Reply #6 on: April 28, 2014, 11:34:03 pm »
 :drool:absolutely stunning
 :notworthy:excellent work
Golf R mk6 R-tech tuned GTX3071r

Stevie35

  • Guest
Re: Mandy's Rising Blue Golf R
« Reply #7 on: April 29, 2014, 06:36:54 pm »
Stunning, love that colour.