Make a donation

Author Topic: DIY - Front and Rear Anti-roll bar fitting  (Read 12984 times)

Offline pudding

  • Global Moderator
  • Just look at my post count
  • *
  • Thank You
  • -Given: 2
  • -Receive: 670
  • Posts: 8228
DIY - Front and Rear Anti-roll bar fitting
« on: September 01, 2018, 07:51:22 pm »
As this topic has come up a few times recently, I thought I would do a guide for fitting a pair of uprated anti-roll bars.

This the easiest way I found to do it after realising I couldn't get the bar out because the ARB brackets foul the steering rack.  There may be other ways, but this will certainly get the job done!

IMPORTANT NOTE: If you don't already have the TyrolSport Deadset fitted to the front subframe, you very likely need an alignment afterwards.   If you do already have the Deadset, then good news, the steering wheel will still be straight afterwards  :happy2:

Parts required

An ARB kit of your choice.  H&R and Eibach are both popular and top quality.  Personally I would choose 26mm front, 22-23mm rear.  Make sure the front bar comes with prefitted clamps. Most do I believe since that is how the OEM ones are constructed at the factory.
Steering rack bolts x 4 (16mm)
ARB bracket bolts x 4 (13mm)
Dogbone mount bolt x 1 (21mm)
Front wishbone bolt x 1 (18mm)
Side subframe bolts x 2 (18mm)
Front subframe bolt x 1 (18mm)
Rear subframe bolts x 2 (18mm)
Console bush bolts x 2 (18mm)
Console bush bolts x 2 (16mm)
Rear drop ARB bracket bolts x 4 (Triple square, M12 iirc)

Optional, but recommended whilst you're down there - 4 x drop links and 8 x nuts (4 x 16mm - rear, and 4 x 18mm - front).  I would check you can remove the nuts at the ARB end before proceeding with the job.  You don't want to start the job, only to find you have to give up because you can't undo the nuts.  The spline recess rounds out super easy. My front ones had to be hacksawed off.  Be prepared!

Tools

A decent socket set
Breaker bar
A triple square socket selection, but the splined recess in the drop links is M6.
A torque wrench
Jacks and axle stands
Anti-seize grease for the bolt threads to make future dismantling easier.

Procedure - Rear Bar.

Jack the car up nice and high.  If you are replacing the rear drop links, remove the rear wheels as it makes access to the upper drop link nut a lot easier.  If you are keeping your existing ones, the wheels can stay on.

It's simply a case just removing the old one and sticking the new one on!  Pop the bushes onto your bar, slide the clamps over and bolt it up.  It's very easy, especially with new drop links  :smiley:

I had just sprayed everything under there with Wurth cavity wax (similar to waxoyl), which is why it look wet.

For adjustable rear bars, the outermost hole is the softest setting.  This bar is set to soft.


Procedure - Front Bar.

Jack the car from the 18mm console bush bolts nice and high.  Place your axle stands on the factory pinch weld jacking points (an arrow on the sill points to them).

I'm not going to sugar coat it - this can be a b1tch of a job, even for experienced people.  Grab a beer, have a fag if you smoke and just be calm, confident and methodical.  It's easily doable if you don't lose your patience and start cross threading bolts!

Remove the belly tray and both lower wheel arch mouldings.

Remove the dogbone from the subframe and gearbox.
 
Remove the lower drop link nuts - Crack the 18mm nuts off with a breaker, then get a ring spanner and M6 spline and undo the nut whilst holding the bolt still with the spline tool.  If the spline rounds off, you will need to hacksaw the fecker off just above the ball joint.  Just as well you bought new ones, right?  :wink:

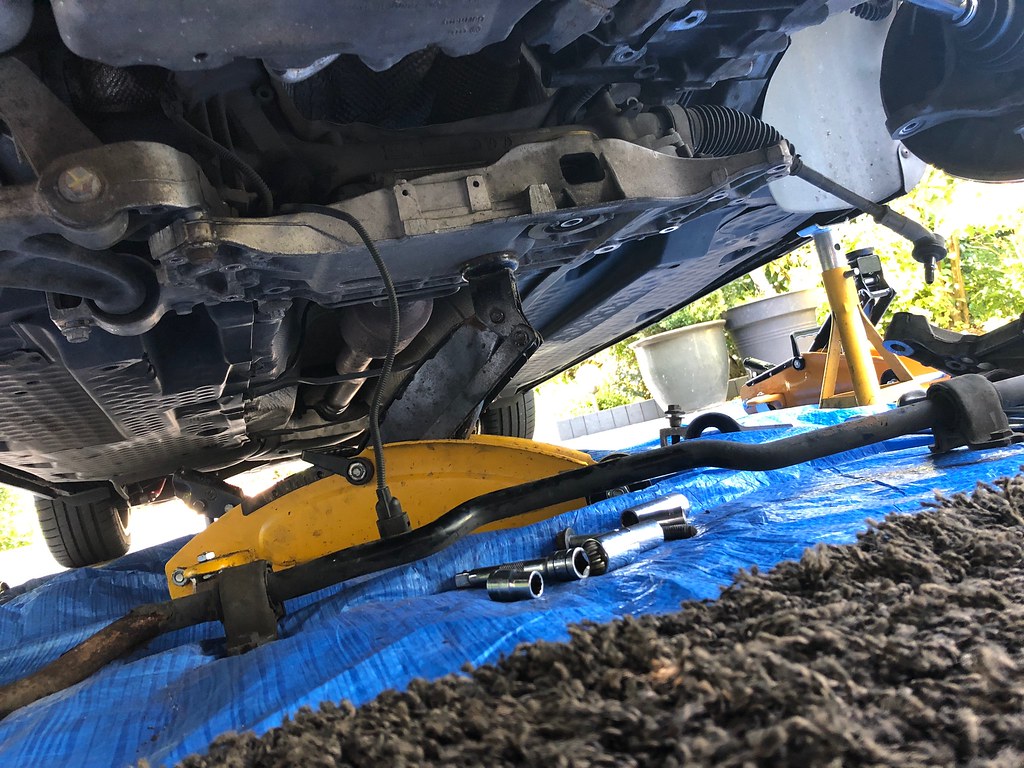
Remove the bolts pictured and the passenger side ball joint nuts x 3 (16mm).  The subframe needs to come down a little way, so the steering rack and ARB need detaching completely.


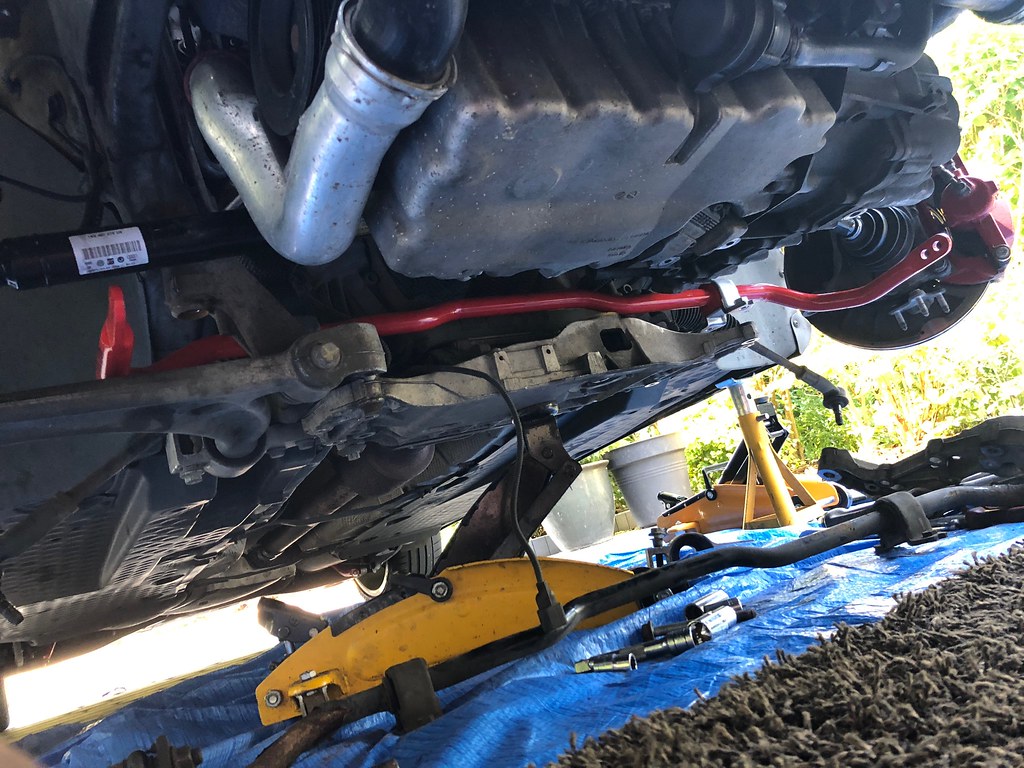
Remove the passenger side wishbone.  Before you pull the big alloy bracket out, you need to detach the steering rack loom and also the wishbone sensor bracket if you have xenons.  The rack loom is attached to the alloy bracket with a 10mm bolt.  Have a feel around in the hole where the ratchet is in this pic, you will find it. 


Wind these bolts out several turns.  The objective is to have the subframe 'hanging' to allow you to wiggle it around to get the ARB out.  Don't remove them completely.


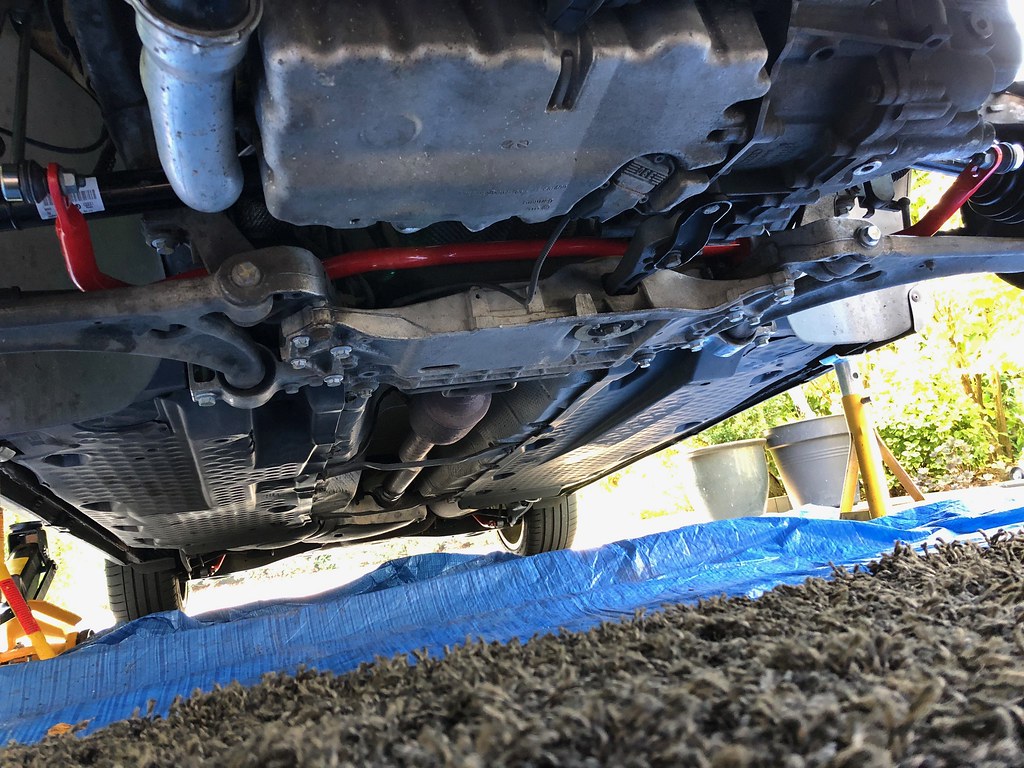
This is what you need to end up with -  The passenger side subframe leg (and therefore the console bush and wishbone) completely removed.   You might not need to detach the tie rods.  I did, just to get as much room as possible but you may be OK not doing that.

Now you can remove the old ARB.  Pull it towards you from the passenger side, turn it 90 degrees towards the driver's side and walk the bar out.  You will see how to get it out, it's easy.


Stick your new ARB in. Walk it round the back of the driver's side alloy bracket first, then push the rest forwards onto the subframe.


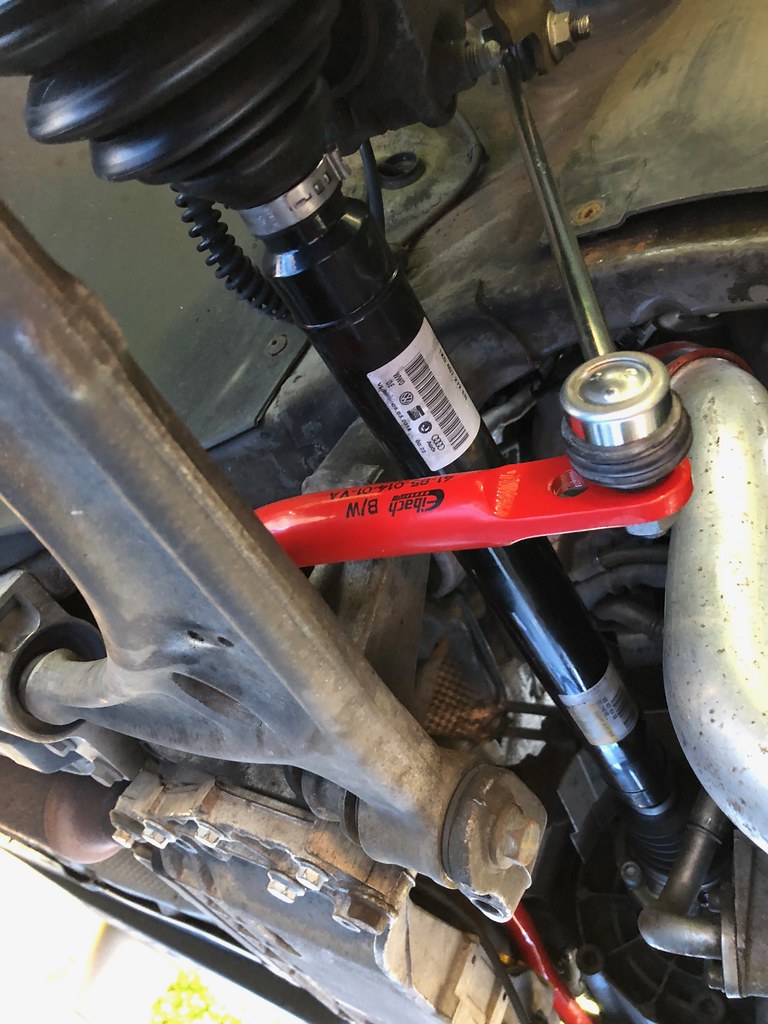
As per most guides, 'refitting is the reverse of removal' and you end up with a nice shiny new bar bolted in place  :smiley:   Refitting all the subframe parts is straight forward, except if you have the TyrolSport deadset.  If you do have the Deadset, you will quickly discover the console bush and alloy bracket will need to be levered and persuaded into place in order to get the collars and bolts back in the right place, but patience, patience, patience.  The reward is not having to get an alignment afterwards :drinking:

Do not reuse the old bolts.  I won't clog up this guide as to why stretch bolts are used and why you must replace them, suffice to say, don't be cheap - just buy new ones!


For adjustable front bars, the outermost hole is the softest setting.  This bar is set to soft.


The usual pile of waste following this kind of work.  Please do budget for new bolts as they can bump up the bill a fair bit.


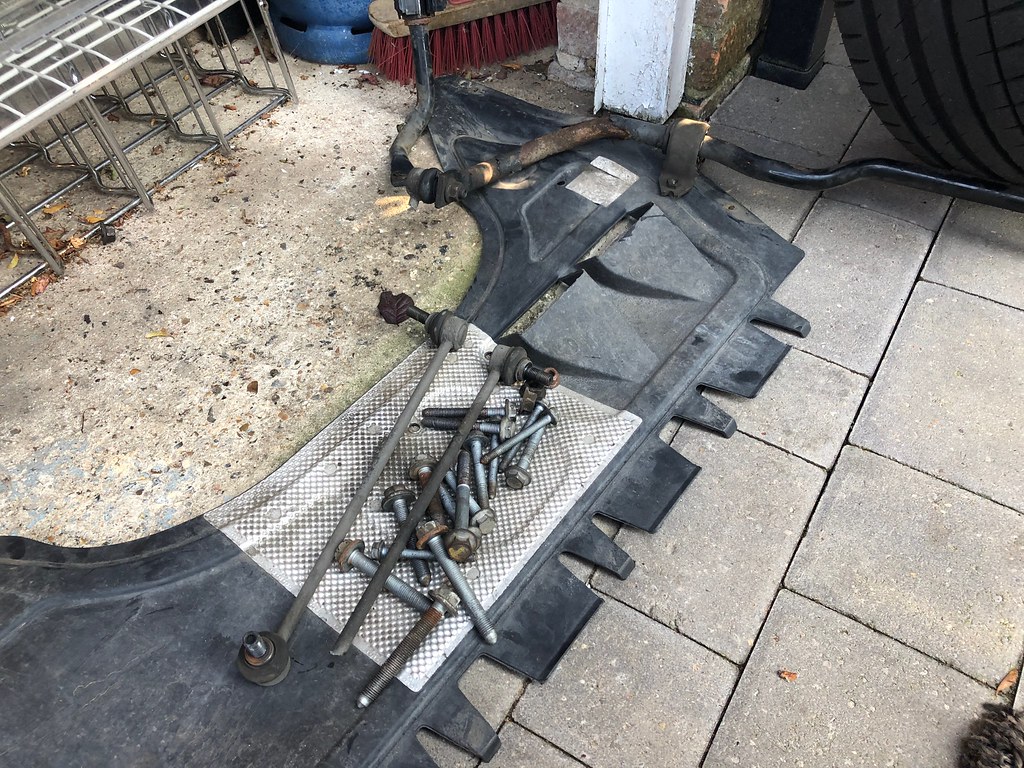
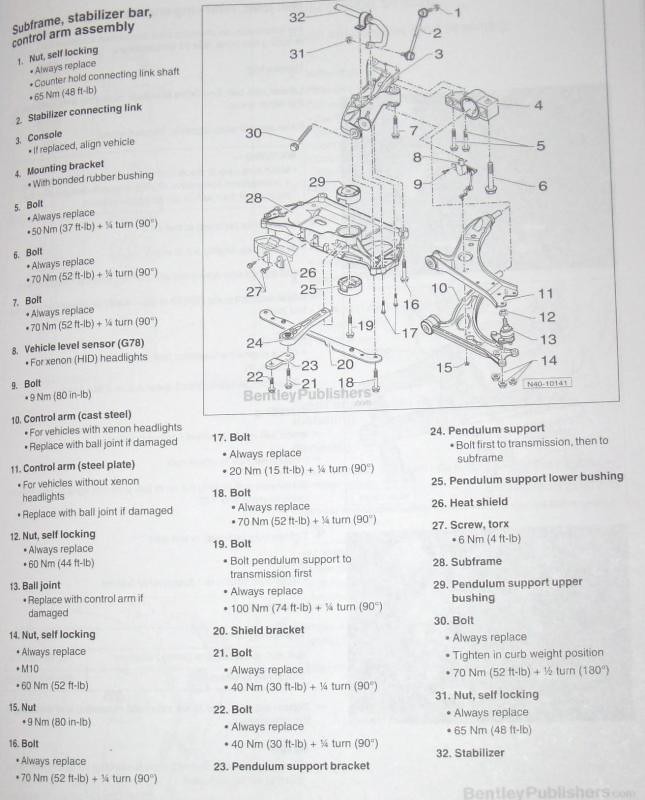
Here are the torque details for the subframe bolts.  You can use that to help you order the right ones from VW, or 'VAG bolts' on ebay.


If you have the Deadset, drive it slowly down the road, check your steering wheel is still straight.  If it is, go and attack some corners  :drinking:

If you don't have a Deadset, get yourself an alignment booked in and take it easy in wet!  You may be lucky and it all goes back on straight, but I highly doubt it!  Expect the steering wheel to be off a few degrees and a pull to the left or right.

I chose the Eibach bars and I'm happy with them.  Even on the softest mode front and rear, the corner is noticeably flatter  :happy2:


2007 ED30 | 2009 TDI 140 | 2016 BMW 330D

Offline doylebros

  • Just look at my post count
  • ******
  • Thank You
  • -Given: 44
  • -Receive: 309
  • Posts: 2774
Re: DIY - Front and Rear Anti-roll bar fitting
« Reply #1 on: September 01, 2018, 08:20:10 pm »
An excellent job there Pudding, I'm sure plenty other members will benefit from such a detailed  how to account :congrats:

Offline pudding

  • Global Moderator
  • Just look at my post count
  • *
  • Thank You
  • -Given: 2
  • -Receive: 670
  • Posts: 8228
Re: DIY - Front and Rear Anti-roll bar fitting
« Reply #2 on: September 01, 2018, 08:47:24 pm »
Thanks mate  :smiley:   I really wasn't looking forward to the front bar but once you crack on with it, it's not that bad  :drinking:

So long as the car is high enough, you won't feel too restricted and therefore won't get mad and start throwing tools at the cat  :grin:


2007 ED30 | 2009 TDI 140 | 2016 BMW 330D

Offline bobby_fodge

  • Won't Shut up.
  • *****
  • Thank You
  • -Given: 22
  • -Receive: 38
  • Posts: 842
    • Email
Re: DIY - Front and Rear Anti-roll bar fitting
« Reply #3 on: September 01, 2018, 10:13:36 pm »
top work pudding

Offline MIJ_JAGGER

  • Won't Shut up.
  • *****
  • Thank You
  • -Given: 103
  • -Receive: 77
  • Posts: 765
Re: DIY - Front and Rear Anti-roll bar fitting
« Reply #4 on: September 02, 2018, 12:59:51 am »
My man (Denzel Washington voice)
Brave to attack this on axles top stuff

Offline Pesky jones

  • Just look at my post count
  • ******
  • Thank You
  • -Given: 2
  • -Receive: 18
  • Posts: 1639
Re: DIY - Front and Rear Anti-roll bar fitting
« Reply #5 on: September 03, 2018, 11:51:10 am »
 :happy2: :happy2:

Offline fab5freddy

  • Just look at my post count
  • ******
  • Thank You
  • -Given: 238
  • -Receive: 239
  • Posts: 2033
Re: DIY - Front and Rear Anti-roll bar fitting
« Reply #6 on: September 03, 2018, 05:46:58 pm »
Nice work Kev 👍

Offline pudding

  • Global Moderator
  • Just look at my post count
  • *
  • Thank You
  • -Given: 2
  • -Receive: 670
  • Posts: 8228
Re: DIY - Front and Rear Anti-roll bar fitting
« Reply #7 on: September 04, 2018, 07:14:43 pm »
Cheers guys  :smiley:

I just wanted it done.  My nearest trusted indies are miles away, and it's not a job I would give to a local dealer.....mega ££££s, and they don't like fitting mods anyway.

As already mentioned, if it's jacked up good and high, it's no sweat.  Another top tip is get a cheap fluffy rug from B&Q and lay on that.  Thank me later  :wink:

The worst that will happen is you'll have to pay for an alignment, which the dealers are actually very good at usually.....and local.


2007 ED30 | 2009 TDI 140 | 2016 BMW 330D

Offline david_kirwan9

  • Can't Read PM's Yet!
  • *
  • Thank You
  • -Given: 0
  • -Receive: 0
  • Posts: 7
    • Email
Re: DIY - Front and Rear Anti-roll bar fitting
« Reply #8 on: April 01, 2022, 11:00:13 am »
Hi guys.

I know old post but hopefully someone sees this. I’m planning on doing the eibach ARB upgrade soon. Just wondering in terms of the OEM brackets on the stock ARB now, will they fit over the new eibach bar and eibach bushing that comes with the eibach kit? Or will I have to try source different brackets? (Hopefully not!)

Thanks

Offline LC5F

  • Just look at my post count
  • ******
  • Thank You
  • -Given: 16
  • -Receive: 79
  • Posts: 1110
Re: DIY - Front and Rear Anti-roll bar fitting
« Reply #9 on: April 01, 2022, 11:04:10 am »
Can't say for Eibach on the Mk5  - usually they are designed to work with what you have got already - Mk5 H&R ones are that way and Mk4 Eibach were too.

Offline RBS

  • Always Involved
  • ****
  • Thank You
  • -Given: 0
  • -Receive: 46
  • Posts: 400
    • Email
Re: DIY - Front and Rear Anti-roll bar fitting
« Reply #10 on: April 01, 2022, 11:23:41 am »
@Pudding:  :happy2:EXPERT!👍🏻 And outside on axle stands! RESPECT :happy2:

Offline pudding

  • Global Moderator
  • Just look at my post count
  • *
  • Thank You
  • -Given: 2
  • -Receive: 670
  • Posts: 8228
Re: DIY - Front and Rear Anti-roll bar fitting
« Reply #11 on: April 01, 2022, 05:31:52 pm »
Hi guys.

I know old post but hopefully someone sees this. I’m planning on doing the eibach ARB upgrade soon. Just wondering in terms of the OEM brackets on the stock ARB now, will they fit over the new eibach bar and eibach bushing that comes with the eibach kit? Or will I have to try source different brackets? (Hopefully not!)

Thanks

The Eibachs come with brackets pre-fitted to the front bar and re-use the OEM brackets on the rear bar.


2007 ED30 | 2009 TDI 140 | 2016 BMW 330D

Offline pudding

  • Global Moderator
  • Just look at my post count
  • *
  • Thank You
  • -Given: 2
  • -Receive: 670
  • Posts: 8228
Re: DIY - Front and Rear Anti-roll bar fitting
« Reply #12 on: April 01, 2022, 05:32:51 pm »
@Pudding:  :happy2:EXPERT!👍🏻 And outside on axle stands! RESPECT :happy2:

Lol, cheers  :smiley:  A pig of a job but one of the best mods for a GTI  :happy2:


2007 ED30 | 2009 TDI 140 | 2016 BMW 330D

Offline RBS

  • Always Involved
  • ****
  • Thank You
  • -Given: 0
  • -Receive: 46
  • Posts: 400
    • Email
Re: DIY - Front and Rear Anti-roll bar fitting
« Reply #13 on: April 01, 2022, 07:53:05 pm »
Mine are laying on the shelve since 2016 :ashamed:
But in the next weeks after the engine gas been mapped, the whole suspension is going to be upgraded  :wink:

Offline pudding

  • Global Moderator
  • Just look at my post count
  • *
  • Thank You
  • -Given: 2
  • -Receive: 670
  • Posts: 8228
Re: DIY - Front and Rear Anti-roll bar fitting
« Reply #14 on: April 02, 2022, 11:44:24 am »
Get them on! They don't do the ride comfort much good but the cornering is superb  :happy2:


2007 ED30 | 2009 TDI 140 | 2016 BMW 330D