Make a donation

Author Topic: HPFP Strip, Clean & Autotech Rebuild (Image Heavy)  (Read 7234 times)

Offline david_phillips95

  • Always Involved
  • ****
  • Thank You
  • -Given: 0
  • -Receive: 4
  • Posts: 63
    • Email
HPFP Strip, Clean & Autotech Rebuild (Image Heavy)
« on: January 23, 2010, 10:00:53 pm »
I have decided to go stage 2+, the downpipe is organised the only thing left to sort out was th HPFP. KRL from here organised a group buy for the Autotech Internals on the mk5 golf gti forum so picked them up for £246.00 Cheers KRL Hoping to see the internals through the door in a couple of weeks.

I managed to pick a HPFP from ebay for only £100 delivered, it was removed from an S3 engine with only 1000 miles (the engine had suffered from oil starvation as the oil pump chain snapped): link - http://cgi.ebay.co.uk/Audi-S3-2-0T-Petrol-Engine_W0QQitemZ380198697573QQcmdZViewItemQQptZUK_CarsParts_Vehicles_CarParts_SM?hash=item58859bba65


Decided to start the strip and clean of the pump, as this is a spare pump it allowed me to spend plenty of time stripping and cleaning it so nothing was rushed. I used the Autotech Guide you can find on their website: http://www.autotech.com/instructions/i127100k.pdf


The autotech guide is pretty good so if you stick to it you cant go wrong, they have listed the tools required in the guide but i will list what i used.

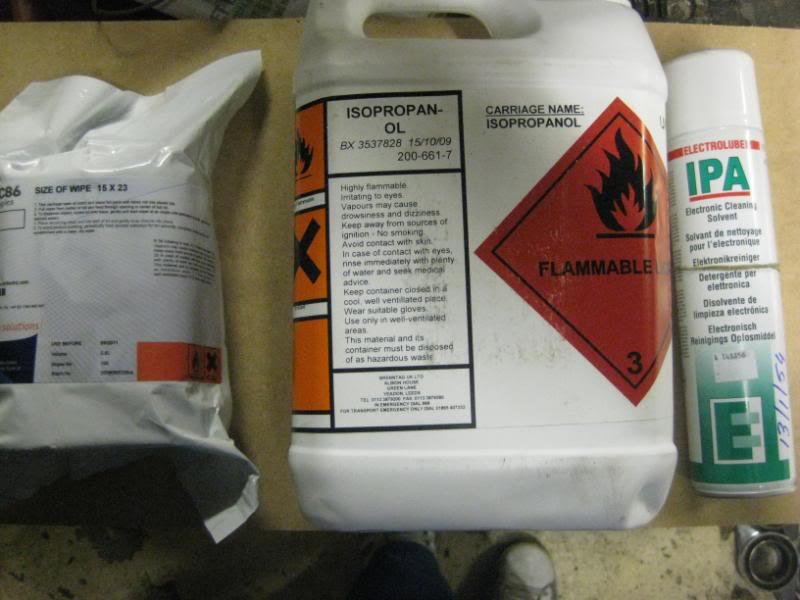
All tools and surfaces were cleaned thouroughly with IPA wipes to remove any soiling and small particles.
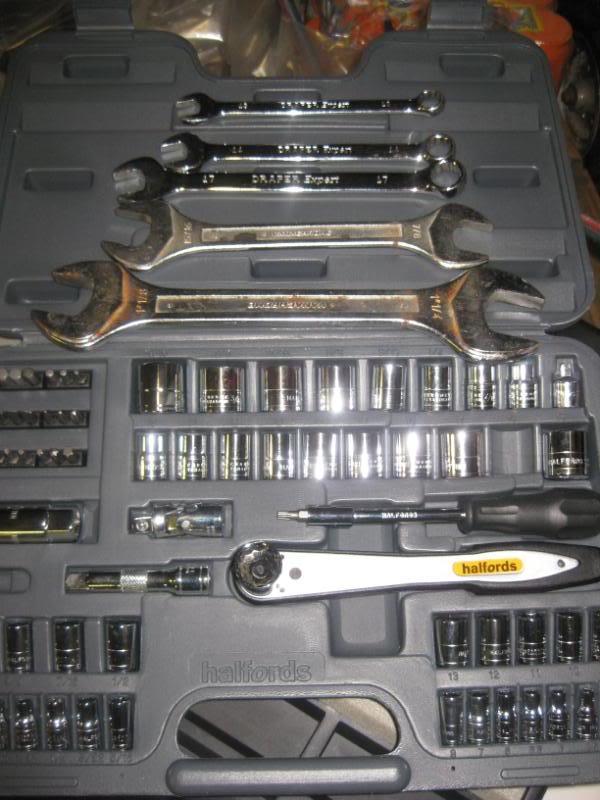
Tools:

18mm socket & ratchet

13mm spanner

14mm spanner

17mm spanner


Imperial spanners where used for the larger fittings as most of my larger tools are imperial not metric

15/16" spanner or 24mm

1" 1/4 spanner or 32mm


T25 Security Bit With Screwdriver attachment


Cleaning:

Polythene Sheet To Cover Surface

IPA Wipes

IPA Aerosol

IPA Fluid

Compressor & Air Nozzle


IPA PRODUCTS


AIR NOZZLE


CLEANING SETUP


HPFP BEFORE STRIP


I worked in accordance with the Autotech guide and everything went to plan, the process to strip and clean took about an hour.


The process i used to clean the parts was:

1.Submerge component in IPA for around 60seconds then scrub thoroughly with brush

2.If components has area that are hard to get to use IPA Spray Can to flush the area clean.

3.Use IPA Wipes to finally go over the component and remove any soiling.

4.Using the Air Nozzle, Blow the component to remove any excess IPA.


Once i had carried out the process above the parts were placed on IPA Wipes on a clean surface till i was ready to bag the components.


STRIPPED INTO BITS


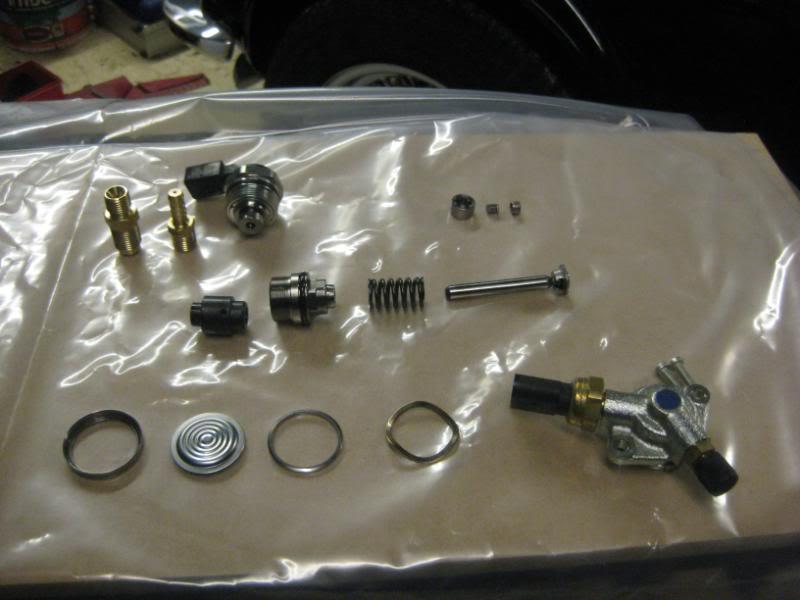
PARTS CLEANED AND PLACED ON IPA WIPES READY FOR BAGGING


The Image below shows the internal components split into two bags, i decided to put the larger bulkier components together as i didnt want to cause any metal to metal damage from a heavier components striking a smaller more fragile one. The Spring, Piston etc in one bag and parts from the Relief Valve etc in another bag.

CLEANED AND BAGGED


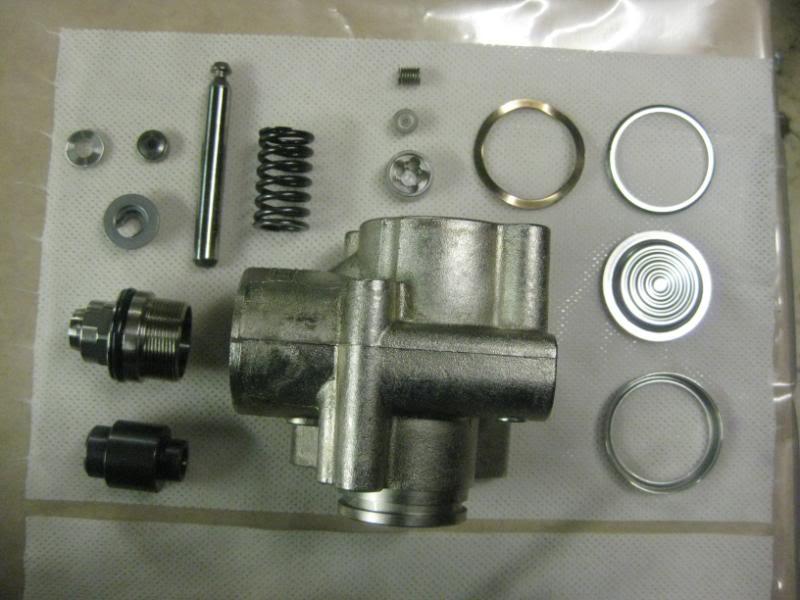
Once all the internal components were bagged, i re-assembled the housing, screwing all fittings back in loose. Once put together loose the pump body and fittings was bagged.


 ALL THESE PARTS WERE INSTALLED TO THE BODY LOOSE.


CLEANED AND ASSEMBLED LOOSE THEN BAGGED TILL AUTOTECH KIT ARRIVES


Ill add pictures of the rebuild once i recieve the Autotech Internals


Cheers Davie


« Last Edit: January 24, 2010, 03:19:17 pm by david_phillips95 »

Offline QD MBE

  • Just look at my post count
  • ******
  • Thank You
  • -Given: 15
  • -Receive: 102
  • Posts: 2497
Re: HPFP Strip, Clean & Autotech Rebuild (Image Heavy)
« Reply #1 on: January 23, 2010, 11:19:15 pm »
very good David.  Good to see some DIY going on.
 :smiley:

Offline s3dubbin

  • Won't Shut up.
  • *****
  • Thank You
  • -Given: 1
  • -Receive: 18
  • Posts: 870
    • Email
Re: HPFP Strip, Clean & Autotech Rebuild (Image Heavy)
« Reply #2 on: January 24, 2010, 12:55:49 pm »
Nice one Dav! I know where i will be heading once my internals arrive!! Your house! Impressed. :happy2:

Offline david_phillips95

  • Always Involved
  • ****
  • Thank You
  • -Given: 0
  • -Receive: 4
  • Posts: 63
    • Email
Re: HPFP Strip, Clean & Autotech Rebuild (Image Heavy)
« Reply #3 on: January 24, 2010, 03:23:30 pm »
Cheers for the comments, you not for giving it a go yourself mate? I enjoyed stripping it down and cleaning it and cleaning it. Do you have a spare pump or are you going to use the one on your car?

Davie

Offline joesgti

  • Just look at my post count
  • ******
  • Thank You
  • -Given: 8
  • -Receive: 35
  • Posts: 4855
  • Eat my sick, Eat my sick.
Re: HPFP Strip, Clean & Autotech Rebuild (Image Heavy)
« Reply #4 on: January 25, 2010, 01:21:27 pm »
nice post!! very helpful, will be doing mine when the GB pumps arrive!  :happy2:


If you need any games consoles or games, accessories, etc etc, PM me for my best price,

Offline Aparoon

  • Won't Shut up.
  • *****
  • Thank You
  • -Given: 13
  • -Receive: 7
  • Posts: 792
    • Email
Re: HPFP Strip, Clean & Autotech Rebuild (Image Heavy)
« Reply #5 on: January 25, 2010, 02:26:19 pm »
I'm gonna give mine a go, or at least watch my old man doing it  :grin:
Edition 30 DSG, Revo 2+,BSH Intake, Autotech hpfp, Blueflame TBE,  Eibach Sportlines, Speedline Turini's GONE

Offline david_phillips95

  • Always Involved
  • ****
  • Thank You
  • -Given: 0
  • -Receive: 4
  • Posts: 63
    • Email
Re: HPFP Strip, Clean & Autotech Rebuild (Image Heavy)
« Reply #6 on: February 22, 2010, 11:06:48 pm »
Decided to get the pump built back together tonight, took a few pictures as i went. Didnt take as many as i would have like but i was quite paranoid about getting any foreign paticles on the components during build.


Anyway here's a quick and simple write up:

Set the bench up again and covered with clean polythene which was all wiped down the IPA wipes to ensure cleanliness. All tools and equipment was also cleaned in the same manner.


All the parts were removed from the bags and placed on the table, all parts were given a final clean with IPA wipes prior to assembly


Close up of the Autotech Internals Packaged
http://i57.photobucket.com/albums/g234/david_phillips95/IMG_0858.jpg

The internals were removed from the box and placed on IPA wipes, these were wiped down with IPA wipes also, ignore the metal button at the top of the picture this is part of the OEM setup.


Pump partially assembled, ready for autotech internals


Autotech internals installed just the spring and retainer and collets to fit


Installation of Autotech Internals Complete


All boxed and ready to fit this week


If you follow the Autotech instructions and keep everything immaculate you wont have any issues. Sorry there isnt much detail but as the assembly is critical i was being extra careful so didnt get many photos taken.


Cheers Davie

Offline Bogdanbd

  • Always Involved
  • ****
  • Thank You
  • -Given: 0
  • -Receive: 4
  • Posts: 63
Re: HPFP Strip, Clean & Autotech Rebuild (Image Heavy)
« Reply #7 on: March 18, 2010, 10:54:04 pm »
Very, very nice!
Any problems so far?

I expect mine to arrive within a week.
4x4-O2 RS REVO stg 3 - 370HP-K04 turbo-Haldex controller-Autotech HPFP-S3 injectors-NGK sparks-RS4 FPR Valve-EVOMS CAI-S3 FMIC+Forge Twintercooler & Actuator-USP fluidampr-custom 3" Magnaflow exhaust-KW coilover kit V1-S3 brakes front/rear + TAROX F2000 discs-LOBA-Sachs stg 2-VF Mounts-BSH PCV revamp-Forge short shifter-W.A.L.K.-H&R AntiRollBar kit + BSH end links -Team Dynamics ProRace 1.21 8x8J Anthracite/White

Offline david_phillips95

  • Always Involved
  • ****
  • Thank You
  • -Given: 0
  • -Receive: 4
  • Posts: 63
    • Email
Re: HPFP Strip, Clean & Autotech Rebuild (Image Heavy)
« Reply #8 on: March 20, 2010, 05:37:54 pm »
I have had the pump installed for almost 1000 miles now and havent had any issues. Loving the extra power  :grin:

Davie