Hi
This is going to be an introductory guide into the wide world of detailing. It's a good long post so maybe grab a brew. I know having read it back it's a bit all over the place but it can be difficult to write about such a large subject in an "easy" way.
despite there being a pretty good guide already people are still asking loads and loads of questions.
I don't feel that the other guide went into enough depth about procedures and actual methods, rather giving the broad strokes to get you going, rather than the nitty-gritty information you need to go from a weekend car cleaner to someone capable of detailing.
It's so long I broke the forum trying to add it as one post so I've had to split it up.
I'm just some guy who has taught himself by reading, trying things out, watching videos, talking with professionals etc. Basically ANYONE can get to where I am if they want to. The key is not to get overly concerned about what you're using and not to worry and act on every little teeny question that may crop up. In most cases it is fine ;)
If you think I know what I'm talking about trust me, compared to some people I am a complete idiot.
What is detailing actuallyWell personally I feel detailing is an art form. It's about taking something and making it beautiful in it's own right. It's about seeing something and making it happen.
Ultimately, detailing is a higher form of cleaning, where particular attention is paid to areas that wouldn't otherwise get a look in. Door hinges, door shuts, window trims, right through to the rubber window seals, wheels and arches. As per the name, the devil is in the details..
As part of the detailing process paintwork is corrected, refined and perfected, this can be done by hand but it is incredibly hard work - we tend to let machines do the work (I will come back to this later).
How does this differ from the traditional valetTime, attention to detail, methods used, etc.
Valets, whether in a man with a van or in a supermarket car park or abandoned petrol station forecourt, are more concerned about CLEANING the car rather than protecting/enhancing/restoring the finish of the vehicle.
Valets GENERALLY (and a rule of thumb here I am speaking broadly and do not wish to offend any decent valeters) work to numbers, they want the most amount of cars done in a given timescale for a given cost. They use cheaper, more mass produced products and buy these in huge quantities.
Many used sponges for such a long time but now they move onto wash mitts. However these wash mitts are dirty and old, often being used until they are in pieces. Many get dropped on the floor and then straight onto your paint.

These ones are some of the worst. They use 5L of water max, and tiny little microfibre cloths. It's basically a bucket of grit and water that they then wipe across your car.
Mainly found in supermarket car parks, they offer "EPIC MICROFIBRE CLEANS" from their mobile trolleys.. Some operate from old abandoned fuel forecourts.

Places similar to the pictures above often offer a "Valet service" for a few quid (often you'll get change from a tenner) . They spend 15 minutes on your car and then it's onto the next guy.. you don't even need to get out of your car most of the time!
Often staffed by immigrants who have little concern for the paint and merely working at any job they can, they are the single biggest thing you can do as an owner to devalue your car IMHO.
When you are at home and you give your car a wash you cannot really call it a detail - People do and it's something which personally annoys me quite a lot, or when they break out a clay bar and a bottle of Autoglym Super Resin Polish and call it a "detail day". We're all guilty of it as we all do it, even me, but realistically a wash and wax, or even with clay, hand polish (with a filler based polish such as Autoglym Super Resin Polish) and any old tub of wax or sealant.. it's still a valet, just a higher end one.
There are some valet companies out there who do things properly, use the right methods, who may even use a machine to apply a filler based polish to a vehicle (saves time) and who do put decent waxes on - so don't hear the word valet and automatically assume terrible. Use your common sense
 What about the petrol station car washes or those ones in my local supermarket ? They seem great!
 If all you want is a CLEAN car, yes , it will be clean. They do a thorough job often enough to give them their credit. The problem they have is with their products and methods, which are seriously damaging over a period of time to your cars paintwork.
It will look clean from a distance, and even up close, but under artificial lights or in sunlight over time the finish will become dull, hazy, with fine cobwebs, marring and other scratches in the finish, which no amount of washing or waxing will remove.
These are commonly referred to as swirl marks which are caused entirely by improper washing and drying. If you never wash your car you will never have swirl marks!
 What causes surface defects, such as swirl marks, hologramming, micromarring?
Swirlmarks are caused by minute particles or dirt, grit, mud, stones, that get sandwiched between your cars paintwork and whatever material it is that you are using on the paintwork.
If your paintwork is completely clean and you take a completely clean microfibre towel, and wipe it on the paintwork, you would leave no marks (in theory anyway).
They happen because of the fine marks and scratches within your paint, and the light hits them and causes them to become refracted and rather than bouncing back straight into your eye, it gets scattered in every which way direction.
Here are some heavy swirl marks

This is caused by years of very poor washing techniques, sponges and chamois, water blades, dirty cloths, etc
As a car enthusiast you will wash your car, and everyone does it, and throughout the washing and drying process, swirls are inflicted into the paint surface. These are what I call little "love marks" , as part of caring for your care you will put little marks into it, tiny scratches. Normal wash marks are as below. This is from my friends Audi S3 that I corrected for him.
 not been "worked" properly (by that I mean there were not enough passes to break down the polish or b) that the combination used has in itself left fine scratches across the surface which would need refinement with a less aggressive compound. The below is the typical hologramming you see when someone puts something like 3m Fast Cut on an orange pad and does 1 pass at maximum speed. It's terrible.<br /><br />[img]http://www.carcleaningguru.com/files/2012/07/buffer-trails.jpg)
Minor hologramming is often referred to as micromarring as well - basically microscoping "marring" (faults) to the surface have been created.
There are also other types of surface defects like sanding marks - where the panel has been sanded for painting and has not been sanded up to the right grit before the paint has been sprayed onto it.
They look similar to this.
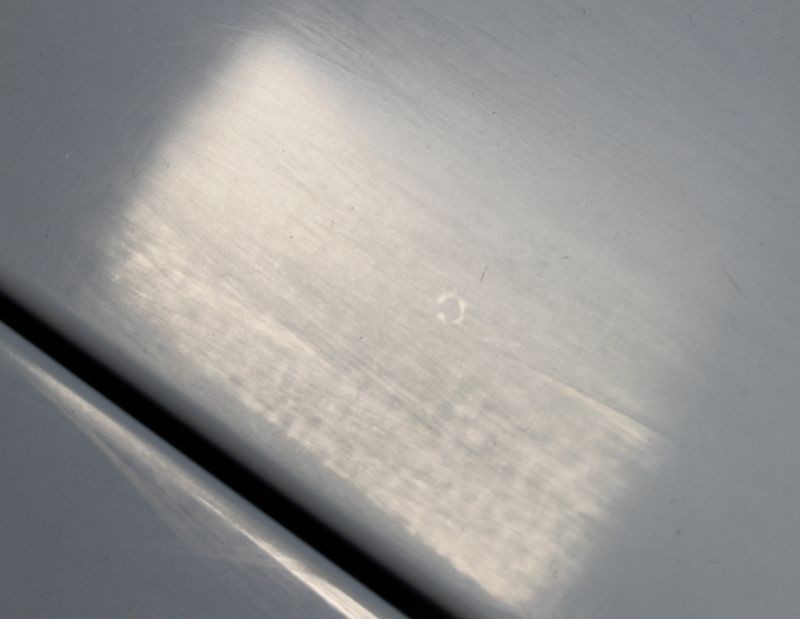
You also have "Random Deep Scratches" also known as RDS which are often caused by brushing stones or articles of clothing against the vehicle, maybe with a branch or a button on a pair of jeans or similar. These are not caused by normal washing.
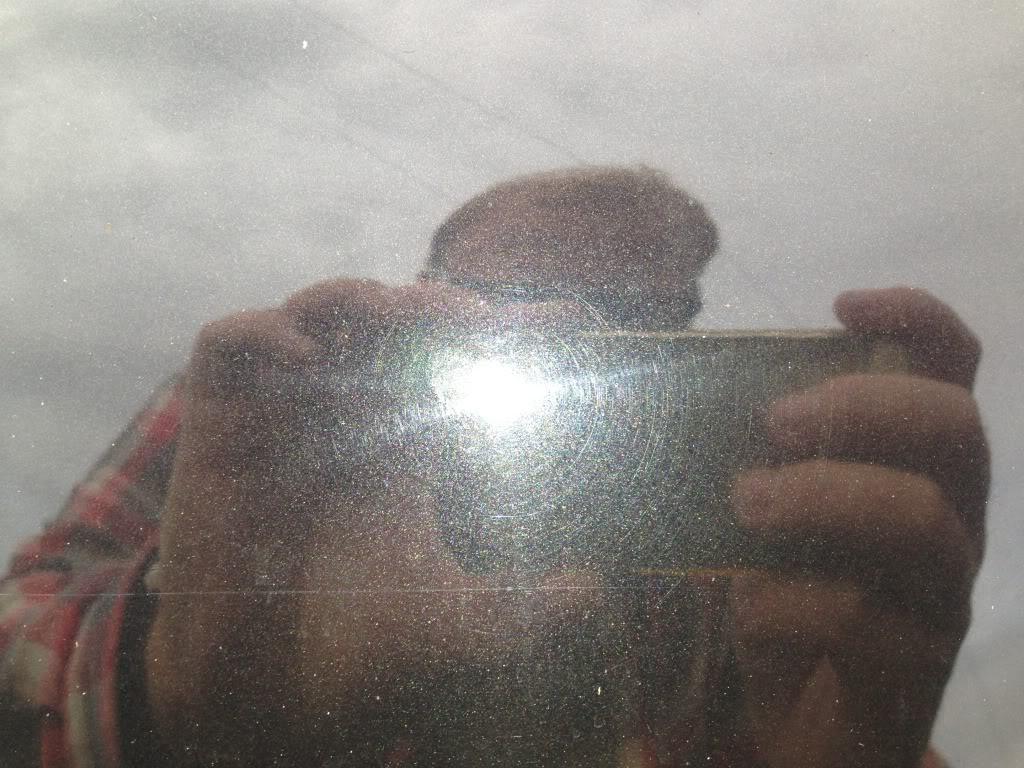
Here you can see some swirls and also an "RDS" (going horizontally about 3/4 of the way down the image, again from my friends' S3.
 Okay that's great but what is the washing process? And what should I use?
Okay first thing you know you need to realise or understand is that most marks are caused by washing the car. To minimize this at the very least you need a Microfibre Wash mitt but I would recomend a quality lambswool wash mitt. Unlike a sponge, microfibre and lambswool mitts offer a passage for the dirt to be encapsulated within the fibres , rather than suspended on the surface and rubbed into your paint, like they are with a sponge (which absorbs water but not particulate).
So buy a wash mitt.
Then you have your shampoo. To be perfectly honest I'm not going to waste my time recommending shampoos when overall they are all about as good as each other. Anything WAX SAFE is fine. Stay away from all in one (wash and wax) shampoos. A good all rounder is Autoglym Body Shampoo Conditioner. It's also available in Halfords which is a bonus..
You also need to have AT LEAST 2 buckets. One bucket is full of your shampoo solution and the other is clean water.
TWO BUCKET METHODYou dip into the shampoo (WASH) bucket, start working on the car from top to bottom, after half a panel or so you place your now soiled wash mitt into the clean water (RINSE) bucket, and rotate it on the grit guard. This is to help remove dirt from the wash mitt, before you place it back into the WASH bucket.
Ideally you would like 2 buckets each with a GRIT GUARD.
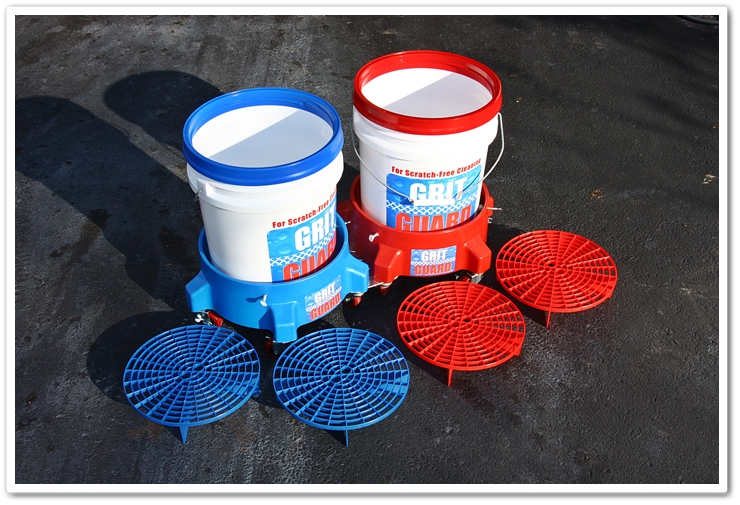
I would recommend two buckets with 2 grit guards , HOWEVER that is up to you. If you only have 1 grit guard, use the grit guard in the RINSE bucket.
Pre Rinsing and washing.Before we even start to clean the car it is important to work using common sense. Is the car only covered in a very light film of road dust from a few days of commuting in the dry? Is the car covered in dirt as you drove 200 miles in the pouring rain down muddy back lanes?
If the car is not really dirty and you're just cleaning it because you want to, I use one bucket and I have no problems. If the car is soiled then you need to use the two buckets and the grit guards to help prevent the scratches.
I would recommend using a snow-foam solution personally. Not everyone has a Snow Foam lance and a jet wash. If not for about 5-10 quid you can buy a perfectly adequate pump sprayer which you can use to help loosen dirt. There are a variety of snow foam and pre-wash products out there. Some are just pre-mixed and others have a variety of strength dependant on dilution ratios so pay attention to what each manufacturer recommends.

Personally I use snowfoam in a pumps sprayer and I use Bilt Hamber Autofoam.
Wet the car as much as possible, either by throwing buckets over it or using a hosepipe/jet wash. Then use your snow foam or pump sprayer solution and allow it to sit for the prescribed time (follow the instructions of the product). Then jet or rinse it off before you start actually cleaning the car.
The aim here is to remove as much dirt as possible before we actually touch the car, and any dirt which does remain on the surface, has been "softened" (just like soaking a baking tray) for easier removal.
Now you can take your wash mitt to the car, work in STRAIGHT LINES, top to bottom. Don't ever do circular motions on paint, ever. Some people break the car up into 5, 10, 15, or even more sections but I just start on the roof on the drivers side, and then work along the cars length in a downward motion..Why complicate a simple process.
You can also clean your wheel arches. To do this you can use an All Purpose Cleaner (such as Autosmart G101 or Bilt Hamber Surfex) or a snow foam or pre-rinse solution.
You can also use brushes to agitate these areas
For example you can see here on my old TDI it's not a pretty sight

However after some cleaning and some agitation...

... Comes out much nicer ;)

You can then protect these areas with a spray sealant such as 303 Aerospace Protectant or even WD40 or GT85 if you have nothing else.
Pay attention to the door shuts as well... not just the hinges but the furthest out areas of the door. These can all be cleaned and dressed (I will get to this later) as well.
Before

After

After you have worked around the car it is not time to rinse off the vehicle thoroughly to remove any last remaining bits of dirt and the remaining shampoo solution.
Once this is done you may reach to your chamois or water blade and start drying the car - BUT DO NOT DO THIS.
Drying your carThe chamois and water blade are the two worst things to use. On glass you can use them but on the paint, absolutely no. This is because, as with a sponge, any dirt left on the surface has no where to go - it would be ground between the chamois/water blade and the paint causing scratches.
Use a quality Microfibre drying towel. You can buy these from £5 (for Kent Car Car ones) up to £30 for Chemical Guys ones. Honestly there is not much difference between them, I would buy a few Kent Car Care ones for daily use (use them three of four times until they start to lose their plush and then chuck them) and a few plusher ones for the more special details.
Ideally pat dry the paint (by folding the towel in half or quarters) and then dabbing it on the vehicle. You can gentley brush the towel across the surface but this does increase the risk of marring the surface.

This is true for ANY TIME use use a microfibre towel on the surface of the paint.
Remove the tags (they just pull out) and FOLD THEM IN 4. Every single time. THis is good towel management (you in effect then get 8 cloths from one) and means you're less likely to scratch the paint by applying loads of pressure on one tiny edge , as if you would when you scrunched up the towel.
How NOT to do it
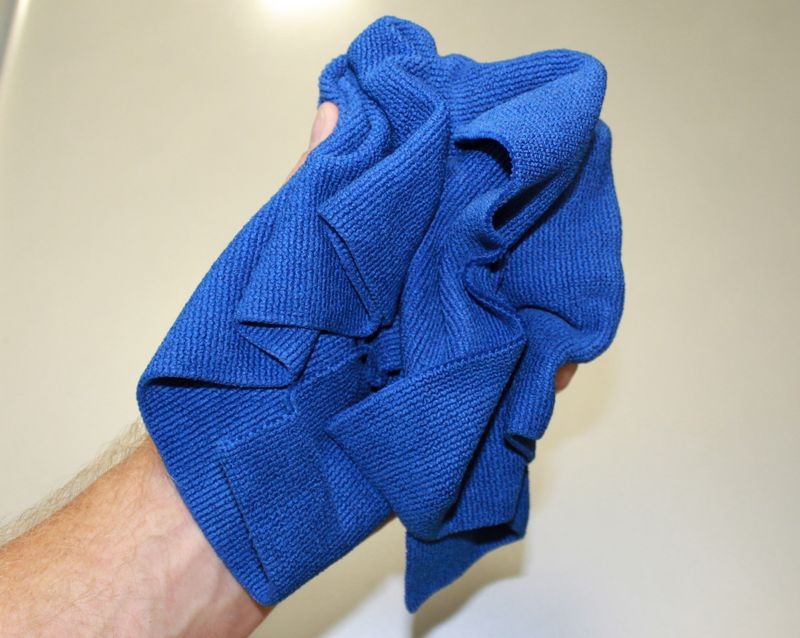
How to do it.
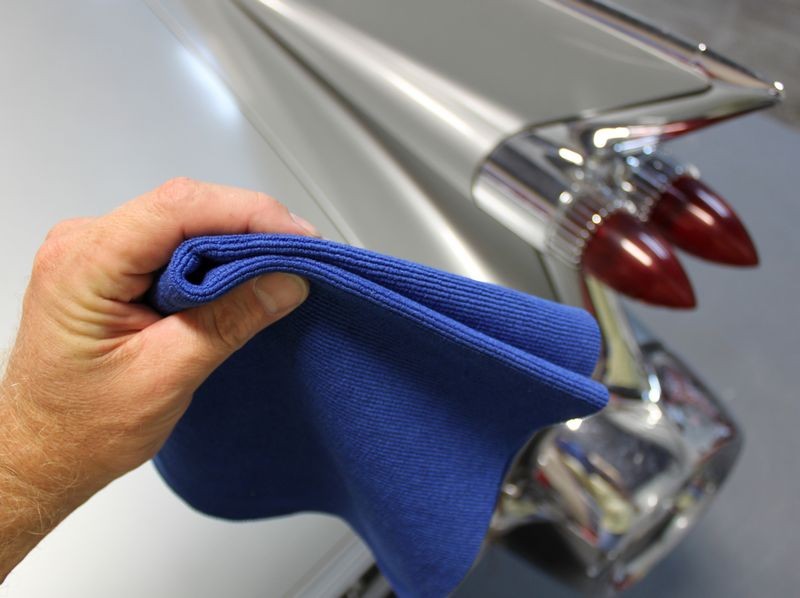
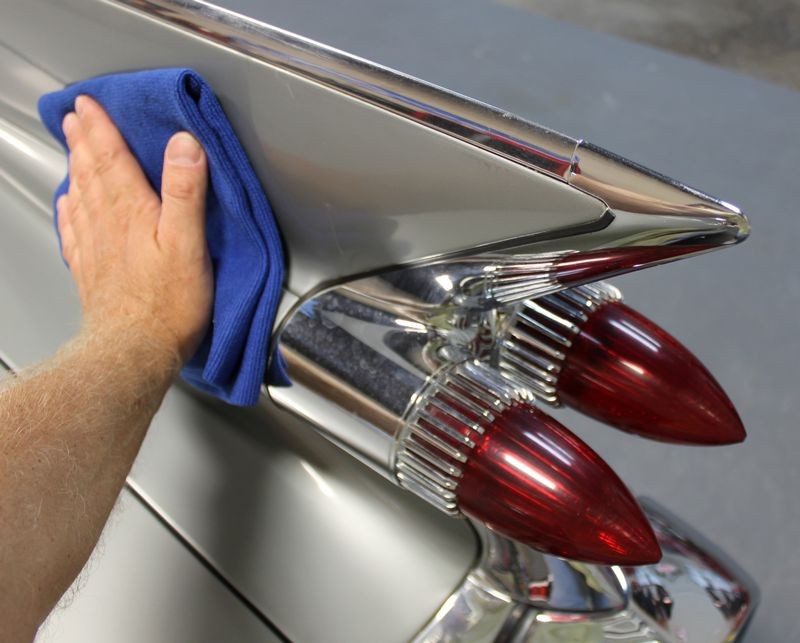
Much better :)
Cleaning wheelsNow this is a bit of a tricky one as some people do wheels first and some do them last. There's no right or wrong way to do it. Anyone who says their is a right or wrong way is an idiot. There is only one important take away.
Nothing that touches the paint should ever touch the wheels and vice versa, nothing that touches the wheels (which are invariably the dirtiest part on the car) should touch the paint.
When cleaning wheels you ideally want to use an acid free wheel cleaner.
Firstly jet/rinse the wheels down to remove any loose dirt. Apply your wheel cleaner of choice and go from there really.. take a little brush (I use an EZ detail brush and a variety of wheel brushes, as pictured)


I generally use a washmitt on the faces and the backs of the spokes and then go around the harder to reach areas, such as the lug nut holes, badges, corners and what not with the brushes. Or you can just use the brushes. The EZ detailing brush is great to reach the back of the wheels with. It very much depends on the finish or the wheel and the design.
If you have Iron X or a similar product, now would be the time to use it. Once you have cleaned the wheels, apply Iron X and allow it time to react. Normally on a cloudy day I would leave it 3 to 5 minutes. You don't want to let Iron X dry on as it becomes less than friendly then.
Once it has reacted again spray the wheel with your wheel cleaner and agitate with brushes once again, followed by a rinse off.
The reason you clean the wheel first is that
IRON X IS NOT A WHEEL CLEANER. It is an Iron Contaminent removal product.
I would not personally use Iron X regularly. Maybe once a month, especially on sealed (waxed) wheels.
Now you've cleaned them all once they are ready to be rinsed down. Once thoroughly rinsed use a microfibre towel to dry them.
Decontaminating your paintYour paint is out in the open and exposed to all sorts of crap. Over time these chemicals and compounds, such as tree sap, iron fall out, road tar and what not, become embedded within the paint and your cars paint feels rough, and yet no matter how much you wash the car little black or brown dots won't ever come off! Well that is contamination.
You may have heard about clay bars but these are not the first step.
You have a few other products at your dispoal that you would want to use BEFORE claying.
Firstly you would want to remove any road tar, glue residue or anything from the car. There are several products out there that do this but Autosmart Tardis is the best. However avoid it getting in contact with trims (like the GTI sideskirts). It will be fine if you rinse it off immediately but if you leave it, they may become faded and you will need to put some trim restorer on them to restore the colour.
Follow the instructions but basically apply this where necessary - often lower sills, around the wheel arches the rear of the vehicle as these are the areas which get covered in tar the most.
Then allow to react and wipe away with a microfibre cloth.
Here you can see some tar on a wheel being treated with a tar removal product.. It would be the same on paint.

Next you can use an Iron fallout removal product.
Iron is what I find personally gives the most gritty feeling on paint, as by it's nature the particles of iron are rough. They are also the hardest to remove. Clay will remove these but at greater risk of damaging the paint.
Some very clever people found a way to actually turn iron soluble and so Iron X was born. Other products are available but they do not often work as well, stick with the original and best IMHO.
ALL Iron fallout removers smell. This is because of the chemical. The less they smell generally the less effective they are. Iron X cherry is not a BAD smell but it's not exactly a field of roses. They do a Lemon scent one which has no foul smell at all.
What I'm trying to say is, it often smells. Deal with it.


anyway - Spray this liberally to the entire car and then allow it a few minutes to react. You would see any reactions leaving long purple lines down the vehicle. This is often best sent on silver or white cars.
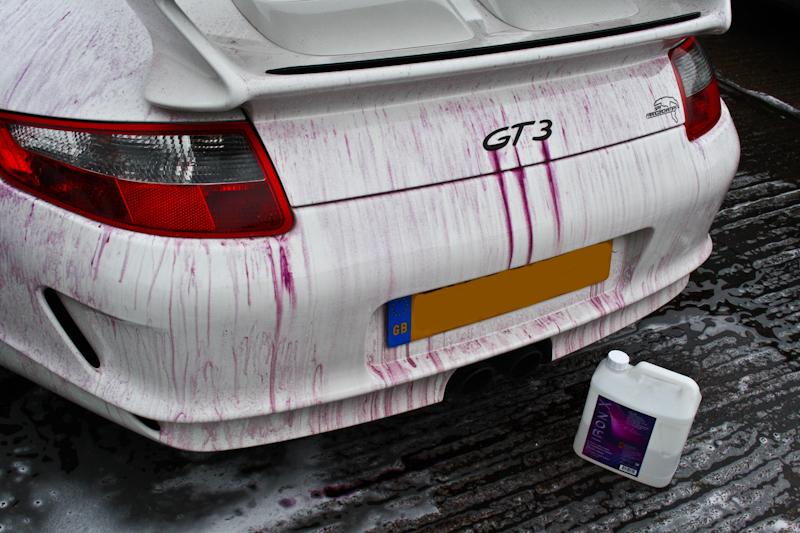
Once you've given it a few minutes to react you need to rinse the car off thoroughly. If you have a jet wash and foam lance now would be a good time to use it once again.
Then you can dry the car.
ClayingClaying is what you would do after using a tar and Iron remover product from the surface.
Clay is used to remove bonded contaminants from the surface of the paint. People say clay does this by being sticky, which it is, but ultimately it's a fine abraisive. Think of it like shaving your paint, as you would shave your face. You're not really taking any skin (paint) off as such, just what is on and in the paints surface.
Doing so will remove any contamination that is bonded to your paint and it will reside within the claybar - As such.

When claying it is important to provide lubrication as the claybar has no pores to absorb what it picks up. It will grind them between the paint and the clay bar itself.
There are a variety of clays and nearly every clay out there, apparently, must be used with a CLAY LUBE.
THIS IS NOT THE CASE. It is ultimately a ploy by manufactures of products to make more money. You are completely fine to use a mixture of car shampoo and water (I use Fairy liquid to be honest here as if I'm claying the car I'm going to be polishing/waxing anyway)
I've used many clays and I keep coming back to Bilt Hamber stuff, it's very good value and doesn't break apart and leave a "bitty" feeling on the surface like some others *COUGH 3m COUGH* and is fine to use with water as a lubricant only (however I always use a shampoo and water solution).
I use a double action chemical resistant bottle to spray the lubrication onto the surface. This is amazing for claying as it sprays on both the trigger press and the depress (hence being a "double action" sprayer) meaning your hand doesn't get achey as fast!
I'd recommend everyone has something like this even if it's not a double action one. It's under a tenner.

If I am claying the car I will not bother drying it after washing , unless I am working outside and it's hot and would otherwise leave watermarks.
So take your clay (normally comes in a bar) and get a section of it, and form it into a patty that is big enough to fit across your 3-4 fingers (like in my picture above). They can be quite stiff at first but with some heat it will improve.
You do not want to hold the clay bar on your finger tips, rather you want it sitting how it is in my picture above - This is so you apply a more even pressure rather than putting all the pressure on your fingertips.. wet the clay bar and then thoroughly wet the surface of the area you are claying. Saturate it. You will be able to feel the clay picking up contaminants from the car as there will be some resistance and after a while of going over the area it will turn smooth and the clay bar will glide effortlessly across the surface.
You do want to apply some light pressure but you do not want to really press hard, let the clay do the work.
Keep spraying the area you are working to ensure proper lubrication. WORK IN STRAIGHT LINES ONLY. Any time you're touching the paint you want to only ever go in straight lines NEVER CIRCLES...
If you drop your clay on the ground then throw it in the bin and get a new piece. It will pick up dirt and stones that will damage your paint.
You will pick up a feel for it soon enough but as a rule of thumb every 1/3rd of a panel you want to stop and check the condition of your claybar to see how dirty it is. If there is contamination on it you'd want to kneed the clay and refold it again to reveal a clean side. Again you would want to work in straight lines top to bottom.
Again depending on how you are working, if it's hot outside (which is not ideal for washing a car anyway) then work a panel at a time, clay the panel, rinse it off and then dry it, move on to the next panel.
You can clay the glass as well.. clay works on any surface...
After you have clayed you may have some residue left from the clay itself, or your chosen lubricant. Generally I give the car a quick rinse down (if you have snowfoam then just foam it and jet it off) and then dry the car finally.
Then you're done with the decontamination of your paint.
Polishing your car so now you've removed all of the contaminents from the paint you are ready to polish the paint.
There are a couple of different kinds of polish
You have what I call "filler polishes" - These are very very fine abrasives, on a scale of 1-10 (10 being like sandpaper and 0 being completely not abraisive at all) they are probably 0.5-1.
Products like this are PB Blackhole, Autoglym Super Resin Polish, Auto Finese Tripple
They are designed ultimately for use by hand (you can use them by machine I will get to this later) and you can use a microfibre towel or , ideally, an applicator pad (either sponge or microfibre.. I prefer MF myself). They come in all shapes and sizes and there's not really any that are massively different from another. I personally prefer either the large rectangular MF applicators or a circular one with a handstrap.


These do not "correct" scratches (correcting means permanently restoring the finish of a vehicle) with abrasives, instead they are more like glazes, using silicones and oils to "fill" in scratches on a temporary basis.
Here's a really terrible picture I made on paint but the point is clear enough
The scratches in the paint cause light to be reflecting in a less than ideal way.
You can see what the hand polishes do along with a wax or sealant.

Over time, after a few washes or over the case of a few months as the wax or sealants start to lose their bond with the paint, and your swirls come back and you are left at exactly the same position.
They are fine if you don't mind doing it every few months but it is not a permanent solution to be honest and is a bit of a half step.
Then you have actual polishes, compounds, jewlers polishes, which come in different levels of abrasiveness, from a wide variety of manufacturers.
Some manufacturers (like 3m....) are very filler rich with their polishes. If you use an IPA wipe down some swirls will return.
Some like Menzerna or Gtechniq P1 are silicone and filler free meaning the finish is permanent.
These polishes come in 2 types, diminishiing and non diminishing.
Non diminishing abrasives are pressure based - that being, the more pressure you apply the more the paint will be removed and the faster swirls and scratches will be removed.
Diminishing abrasives start off abrasive and over time through the polishing action, break down into much smaller particles.
I prefer diminishing abrasives personally. You may find different.
Maching polishing..Firstly it is important to know why we decontaminate the paint before we start to machine it - because any debris, dirt, particles of iron, etc, can interfere with the process. At best these would just get embedded into the foam and cause no damage but in the worst case some dirt can get stuck between the pad and the paint and cause mayhem, basically grinding grit into your paint so you end up putting more damage in than you are getting out!
You can work polishes by hand but it's VERY hard work and takes ages, it's much easier to use a machine such as a DA or a Rotary. I am not going to cover genuine hand (correction) polishing
These permanently remove the surface defects by actually removing some of the paint. As you are basically removing paint by the process of erosion you should know how much paint you have, as it is IMPOSSIBLE to tell by eye. Anyone who says they "can tell" is talking BULLSH*T.
Firstly you need to be able to inspect your paint so the best tool for this is a SUN GUN.
This can be a really bright torch, phone light, whatever. However you need something really bright.
Phone lines are only really good on really dark cars and you get a very narrow angle of viewing (as the light power is quite weak)
The best thing for the money is what's called a Brinkmann Dual Xenon which is what I have.

It is a rechargable flashlight where you can adjust whether there is one or two bulbs. It charges up from a US socket (adaptor) or from your cigarette lighter which if you're a traveling detailer or valeter it can be charged while you're driving about.
This is to help you spot the swirls to begin with. This is very important both from a "diagnoses" point of view, that being you are assesing how bad the paintwork is and also when you are in the process of actually correcting the paint, an easy way to verify your progress and ensure you're actually getting the results you want.
Swirls are based on seeing fine imperfections in the paint at many angles. Therefore a stronger light is good so you can move around and see more clearly. It's possible for example, that you may remove a scratch when you look at it from one angle but when you look at it from another it's there clear as day. This is where a sungun and/or strong light source help you. Being handheld it's easy to move about and get a much better view as well.
You really need a paint depth gauge (PDG) too, which measures the remaining paint.
Some actually tell you how much paint you have based on remaining colour coat and remaining clear coat depth (You are interested in how much clear coat you have at the end of the day) but these machines are VERY expensive.
Most people work off an estimate using a normal paint detective gauge which just tells you how thick the coating between the surface and bare material is (includes paint, clearcoat and base coat). This is better than nothing and acceptable for most people.
EG ROUGHLY it goes 30/30/40 as base, colour and lacquer percentage. This is NOT always the case and is a pretty poor way of going about it but it's all about working to the best information you have to hand.
Normal paint depth gauge.. this one is a PD8

Positector for example do some like this.

These are massively more expensive but able to tell you specifically how thick EACH LAYER of paint are.
So if you are starting with a car that's not been machined before and has let's say 120microns of paint you could realistically go to about 85 microns before you would strike through (where you go through the clear coat and only have paint there) however polishing is as much about maintaining the remaining clear coat than it is removing scratches. the lacquer provides UV protection against fading and you don't want to remove this.
That is not to say you can go to 85 microns left or that you should use that figure in mind! You should use it as a guide to be aware of when you're at risk of burning through.

Burn through on a Blue Peugeot. The paint at the point of burn through measured between 75 and 80uM.
Other cars may be different but that is something to bear in mind... personally I wouldn't touch a car below 90um!
After a burn through you will NEED to have the panel resprayed. You might get away with a smart repair if it's in the center of a large panel (eg bonnet or roof) but really it would need spraying at a bodyshop.
The process of machining is quite easy to be honest as long as you are patient and work through it methodically.
What do you use to machine paint?First of all you have pads and compounds.
There are many different compounds from various manufacturers, 3m, Menzerna, Scholl, Gtechniq, Chemical guys, etc.
They each behave differently in terms of how long they stay active for, how aggressive they are, price, whether they are diminishing or non diminishing, etc. On the bottles or the manufacturers website they will explain how aggressive the polishes are (more aggressive = more ability to remove swirls however this will remove more paint and also be more likely to leave micromarring and need further refinement).
You have pads as well which come from a wide variety of manufactuers.. Chemical Guys do Hexlogic, Lake county, menzerna also make their own range of pads. My personal choice is the Chemical Guys Hexlogic Range.
Pads, just like polishes, are designed to have a different amount of "cut" - this is the ability of the paint, with a polish, to remove swirls.
For example if you have a really heavily swirled finish you may need to use Menzerna FG400 along with a Chemical Guys Orange pad (this is a very aggressive combination) however in another case you may only need Menzerna SF4000 on a Chemical Guys White pad (this is what's known as a finishing combination) -
You can mix and match as well, for example if you wanted a bit more cut than what the SF4000 could give you with a white pad, you could jump to using the same polish with an orange pad to increase the cut slightly.
My PERSONAL choice is Menzerna Polishes. However the next guy might be a Scholl guy, the next may be a Chemical Guys guy. There's no "right" or "wrong" polish. There are some which are better than others however.
It is important to remember as well about the PAD SIZE and the BACKING PLATe.
The backing plate is what holds the pad to the polisher. You can get multiple sizes, normally you have what are called "spot pads" (for small areas and come in 3 or 4 inch sizes) and then you have 5 inch pads, you can also get 5.5 and 6 inch pads.
You should use the correct size backing plate for a given pad.
EG if you have a 5.5 inch pad you can use a 5 inch backing plate. You want the pad to be larger than the backing plate ideally , this offers some protection. As the pad is relatively soft and non-damaging where as if you tip the polisher over you will grind through the paint instantly.
You can use a larger backing plate than your pad (eg put a 5.5 inch pad on a 6 inch backing plate) however this is not good practice at all. On the plus side your pad will last longer (in terms of it won't end up looking like this)...

But it is stupid - a pad is under a tenner and for the sake of being a cheapskate you risk damaging your car to the tune of hundreds of £?
Also it effects heat build up within the pad and, as such, defect removal rate.
In short - stick to the right sized pad don't mess about.
Here is a list of some Menzernas Polishes and sealants to be applied using machine and their relevant cut and gloss levels

And here's a list of Chemical Guys Hexlogic pads and their cutting ability

It's very important to pick the right combination for your job. You can realistically get by with 3 polishes (finishing, medium and heavy) and 3 pads (again a finishing, medium and heavy).
I also use a microfibre cutting system which is much more aggressive than the available foam pads and is designed for use with "harder paints"
I would recommend for the beginner detailer that they get a "medium" pad in a "spot" version (so 3 or 4 inch) as well as a 3 or 4 inch (the correct one for the pad). As you build up the confidence and knowledge then you can work up to building up a bigger range of pads.
Quick one on paint hardnessNot all paints are born equal.
Some are hard and some are soft.
When we talk about paint hardness we talk about their scratch resistance and also how difficult or, how "hard" the paint is when it comes to removing scratches and swirls when correcting the paint.
A softer paint, normally found on Japanese cars, will mark much more easily with normal washing and drying. However it will be able to be restored using much less aggressive compounds.
A harder paint is normally found on German cars and some American models, which withstand normal wash scratches much more easily HOWEVER they require a much more aggressive compound to be used.
This is why it's VERY IMPORTANT!!!!! to ALWAYS use a test spot with the least aggressive compound, in conjunction with your paint depth gauge, to work out a) how much paint is left but also b) is there an unusually large amount of paint indicating the vehicle has been resprayed and therefore the paint may be of a different hardness level?
Generally on a car with factory paint you can use that one combination from your test spot throughout the vehicle however if there are any areas which have been resprayed then you need to start from scratch on these areas.
What machines are thereThere are two machines ultimately .
A dual action (such as a Das 6) or a Rotary (such as a Silverline).
Here's a Das 6 pro from CYC with a Megs MF pad attached
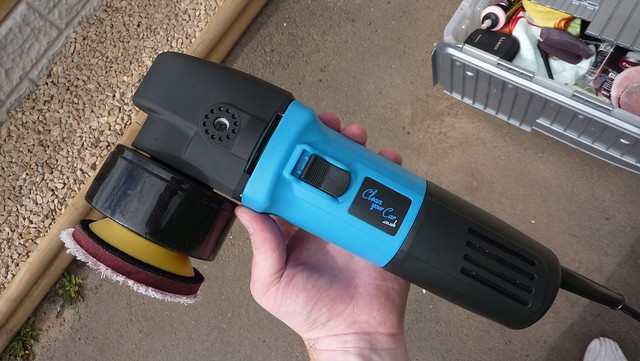
And here's a Silverline Rotary with some random buffing pad on it lol

I myself use a Das6 Pro and in conjunction with my chosen pad and polish combinations there is not a paint surface it can't work on.
I've used Rotaries in the past which are faster but I personally prefer DA, I can get the results I want, while I do some peoples cars it's normally friends and families so time is not an issue and not only that but there is cost, my DAS 6 Pro cost me £100 where as a decent Rotary that doesn't weigh a ton (the Silverline is under £50 but weighs SO MUCH it's impossible to do a whole car at once) is 3 or 4 times as much.
Rotaries are more difficult to use. They are mainly used because they can achieve results more quickly. However they are also more dangerous in the wrong (or shall we say inexperienced hands).
The difference is in the way the heads (where the pads mount) rotate. There are new Dual Action polishers out (the Rupes bigfoot for example) which combine the ease of use of a DA with the speed of a rotary by having a larger throw (cover more surface area basically).
Rotaries as their name suggests are rotary only. They spin about a fixed axis.
On a Dual action, what a lot of people don't understand is that they also spin however their axis is not fixed as such, it oscillates
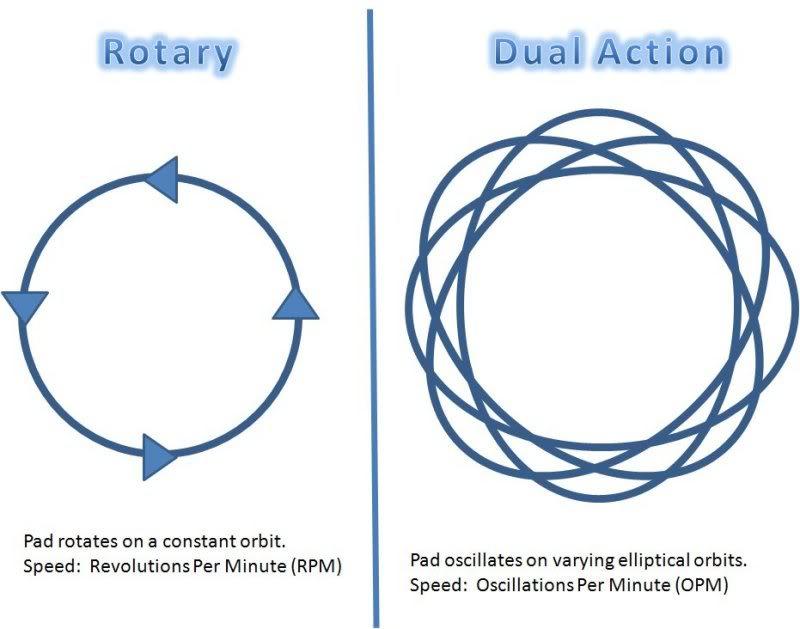
So machine choice is fairly important but not the be all and end all. If you are really new to the whole detailing and paint correction game then definitely start with a rotary.
DA's work on SPEED SETTINGS eg 1-6 and rotaries work on a RPM basis.. DA's speed settings still correspond to an RPM however that information may be different on each machine, same goes for rotary.
The first thing is to tape off the sensitive areas. I personally like to tape off all the door shuts, around the windows, where there are rubber seals , as polish residue is a PAIN to remove from these areas and around the door shuts the paint is VERY thin and it's easy to burn through on these edges. When you become more comfortable and precise you don't need to worry so much about it however if you're beginning I would recommend covering at least an 1/8th of an inch from any panel edge .
You can use any low-tack tape however 3m 3434 tape is like £3 for a roll and is regarded as the best tape for the job.
An example:

It's best explained by watching (that's how I learnt) but ultimately you take your machine polisher and your pad which is aligned as central as possible (with a hook and loop backing system basically it's velcro pads holding to the velcro backing plate) place a few dots of polish on the pad and dab it around the surface. You don't want to literally coat the entire pad in polish, 4 or 5 10p size blobs are more than enough. The first time you use a pad you'd want to prime it so spray it with one spray of water before you start or you can apply extra polish and spread it around the pad with your finger.
Then work the area (roughly the same size as a regular microfibre towel to begin wtih, you can work slightly larger areas as you get more comfortable but really you you want to split up panels into 3 or 4 sections).
EG I will break a door into 4 sections .. split in half using the rub strip as the verticle seperator and then split horizontaly half way along the door.
When polishing you ALWAYS START WITH THE LEAST AGGRESSIVE COMPOUND and work up until the desired correction results are achieved.
Work in a snake like pattern going up and down along the length of the area you're working, overlapping each pass by about 30-50% and then work in the opposite direction. First you want to quickly spread the polish on a very low speed and then you want to slow down and bump the speed up and actually start to machine.
If you have a Rotary there is a technique called the "Zenith point" technique which I don't personally use but many do. Ultimately you start slowly and then work up in speed to certain stages, and then back down before turning it off. You can also adjust the pressure you're putting on the machine.
Talking of pressure you only want to be really applying enough pressure to hold the machine flat against the surface. You don't want to PUSH on it... let the machine do the work.
Work until the polish has started to haze over (again this is hard to explain it becomes second nature when you're doing it) and then turn your polisher off (don't remove it from the surface of the paint until it's stopped spinning otherwise you'll get splatter EVERYWHERE) and then take a clean plush microfibre and buff away the remainder of the polish.
While I am not a massive fan of Autogeek this video is pretty good and shows you a pretty good idea of what to do
Here are the results I got on my own car.


You can also machine polish your lights


However you need to be aware that as part of the machining polish, heat is generated and you need to understand how different materials will be effected by heat, eg the difference between machining on a metal panel (Eg a front wing) and a plastic panel (eg a bumper).
Ultimately as I said it's pretty hard to explain but easy to watch and even easier to do. If you are at all nervous before taking it to your own car go to a scrappy and just ask if there are any scrap panels laying around. Normally you'll get a door or bonnet or something for free or a tenner, and then you can mess around on that to your hearts content.
But honestly it is not hard to do it right, you just have to keep your wits about you and the most important thing is BE PATIENT.
The biggest problem most people have is rushing, they work the machine too quickly and do not give the polish time to break down leaving holograms, that's the main thing that happens.
It is very counter intuitive at first, you think you're damaging your cars paint but really you're not and you don't have anything to worry about.
Watch some videos on Youtube and watch by learning ;)
It's also important to be comfortable when you're working and keep the cord for the machine over your shoulder to avoid it marking the paint.

Some other decent video guys
[/youtube]
There are single stage machine polishes, 2 and 3 and even 4 stage machine polishes.
However many stages usually dictate how refined you want the finish. You can never get perfection from one step.
To remove light scratches you can use a less aggressive compound and pad combo but you won't remove all scratches in a single pass.
To remove heavy scratches you need to use a heavier duty compound/pad combination, which will leave tiny micromarring behind in itself
The micromarring will need to be removed by using a less aggressive compound (often known as a finishing polish) afterwards to refine the finish to a point of absolute perfection in terms of reflection and clarity... so that's why you can't ever have a perfect 1 step polish unless your paint is already nearly perfect.
Generally a one step polish is used to remove as many scratches as possible without leaving micromarring or hologramms (eg in a 1 day paint correction session).
Remember when I was talking about using a machine to apply a filler polish like Autoglym SRP? Well you can do that as well. You would need to use a finishing pad however it needs to be done faster than if you were actually machining using a compound, as you would dry the polish up, and at a lower speed, so normally you make a 3-4 passes on speed 4 with a light polishing pad (eg a Chemical Guys white pad)
you may find yourself needing to have a spray bottle of water handy to help re-activate the polish as it dries out.
Clean up!!After you have checked your work and you are happy with the results you may want to take this time to remove all the tape from the vehicle. Now would be a good time to snow foam the vehicle and again dry it. While the snow foam is doing it's thing you may want to get a detailing brush and a microfibre towel and go around the car and remove any of the polish or tape residue that is stuck in awkward places (like door window seals).
A cocktail stick and cotton bud will really help out here.
You need to be careful during this phase as if you scratch the car again all of your hard work would have been for nothing. YOu want to be as safe as possible.
There what I normally do is rinse the vehicle thoroughly in a pre-wash solution or snow foam.
Then I take my hosepipe and my mitt, with fresh wash and rinse buckets, take some shampoo solution from the rinse bucket and spray the hose INTO the mitt as you then clean the car again - Again working in straight lines.
This provides extra extra lubrication at this critical phase. (you can also do this during any wash if you want).
I got this technique from Larry from AmmoNYC - I am not sure if he was the "first ever" to do this but it works quite nicely.
Go to 8m04s
Then dry the vehicle very carefully. Again using a lovely clean microfibre drying towel.
After this you move onto the LSP