As I mentioned in another thread, I'm upgrading my speakers in my GTI. Mine has the 10 speaker option and I'm just upgrading the 6 speakers in the two front doors. (Well, that's the plan for now anyway).
I've chosen Morel components (mostly based on GLIDN's recommendation) and have gone with their Virtus 3 way components and their recently released 4 channel amplifier.
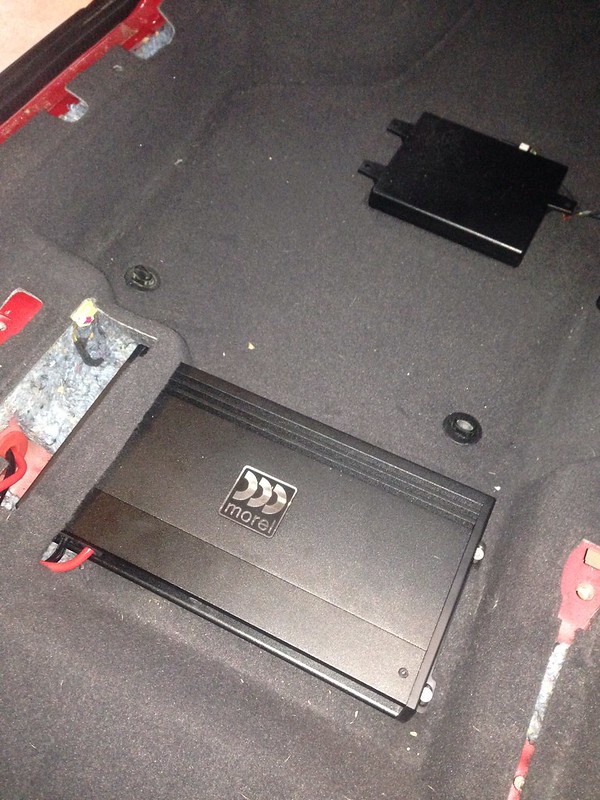
Initially I was going to install the amp in the boot behind the carpet behind the left wheel well. I wanted to install it under the driver's seat but it wouldn't fit there. I then decided I might try installing it under the passenger seat and move my Bluetooth module that is currently there to under the driver's seat. I removed the front seat this time to properly work out what could be done. I worked out that it only required a small amount of trimming of the carpet and removal of the seriously over-engineered housing for the airbag plug.
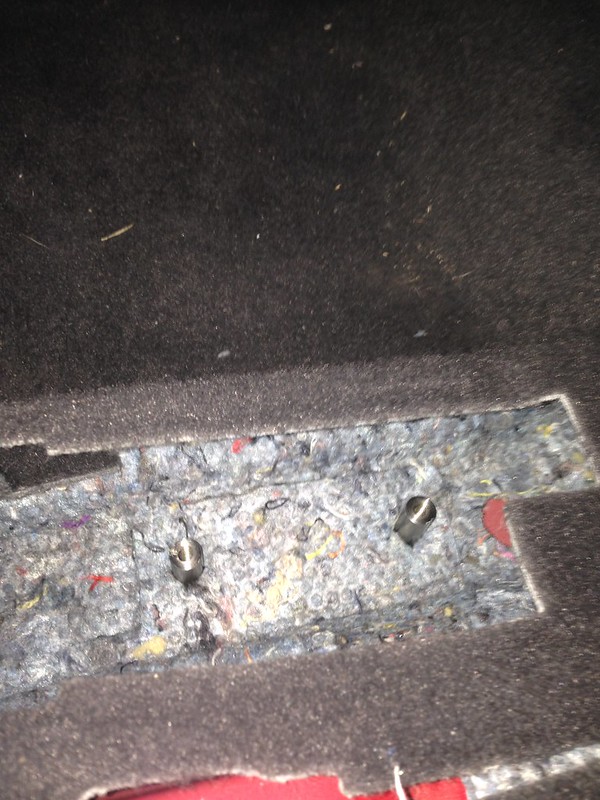
Under the carpet and sound proofing I found these 2 M6 studs on the floor:

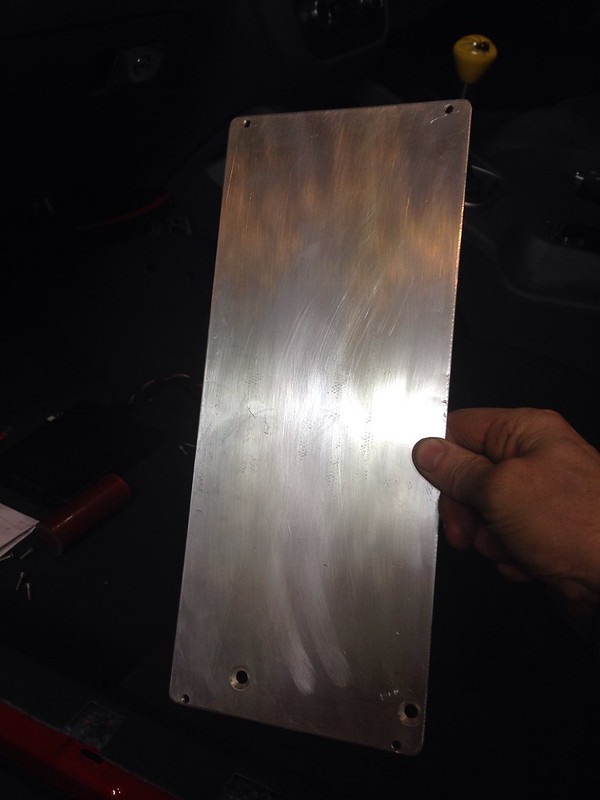
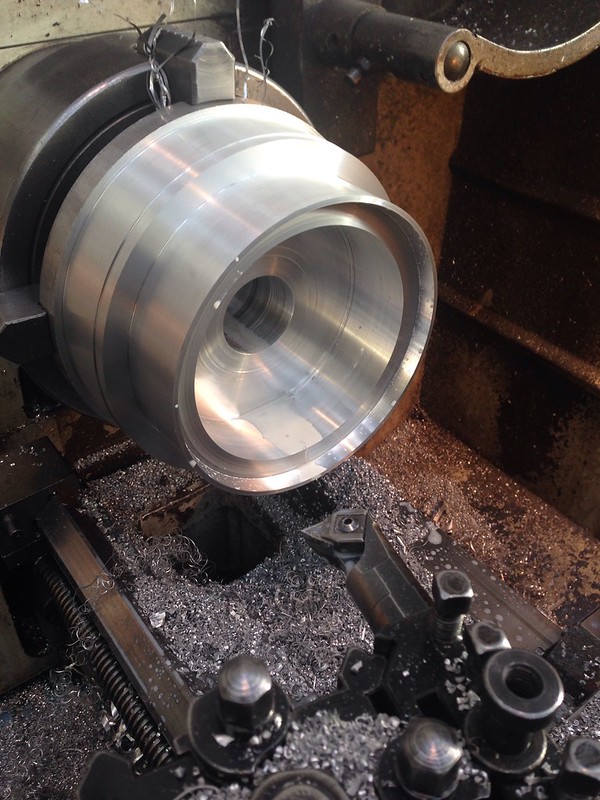
I'm not sure what they are there for. Maybe to bolt down a factory amp? Anyway, I decided to use them to mount an adaptor plate that the amp could then bolt to. So I made the adaptor plate from 3mm aluminium:
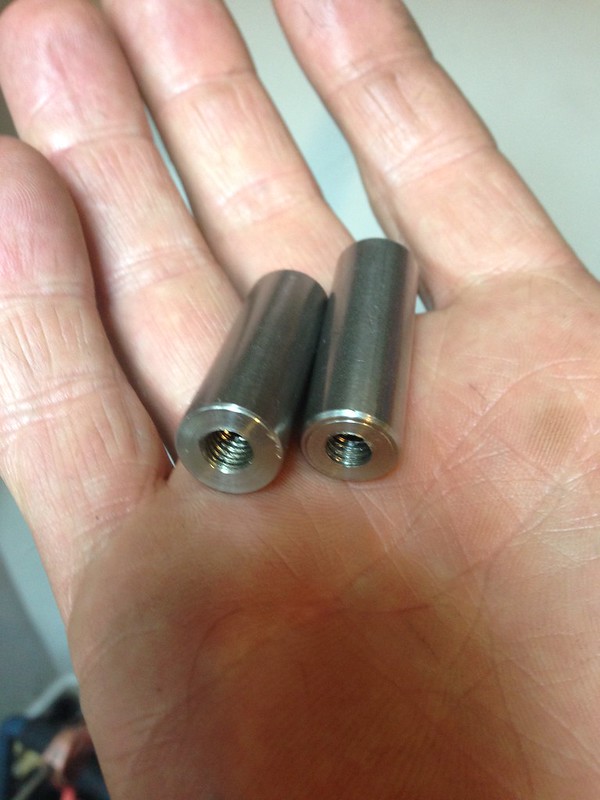
I also turned up some stainless spacers to raise the adaptor plate to the correct height under the carpet:
and installed them onto the M6 studs:
and bolted the adaptor plate to the spacers which I don't seem to have a photo of.
Installing the amp here made doing the wiring much simpler as I ran the power lead along the left into the engine bay and will run the sound wires into the exiting holes in the carpet for the Bluetooth module and up to the radio.
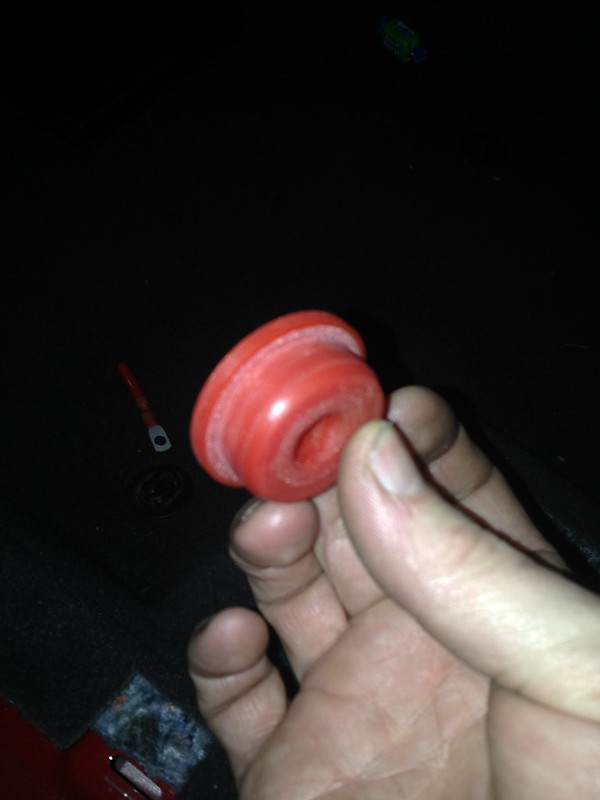
After removing the housing for the airbag plug, it left this hole:
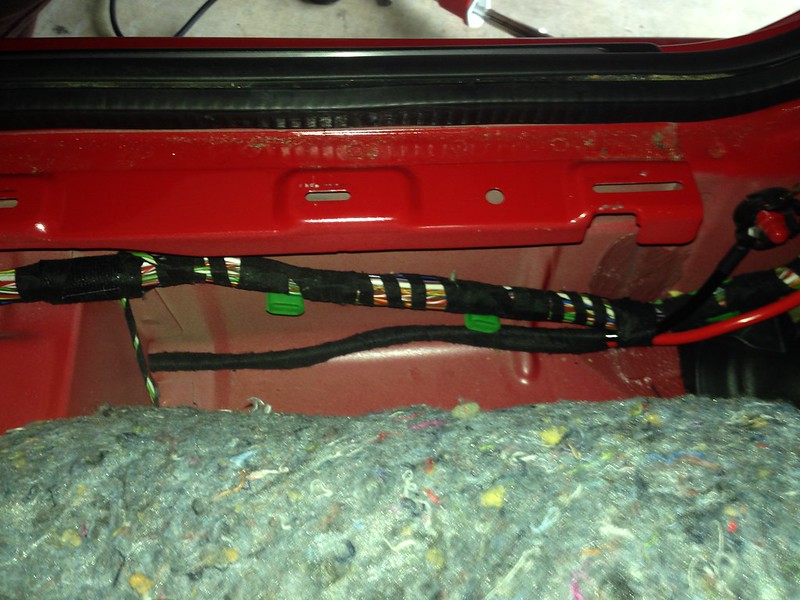
which was perfect for running the power and ground wires and then joining the factory loom. So a urathane grommet was turned up to go in the hole to protect the wires:
and installed into the hole:

The ground wire was attached to an existing grounding point:
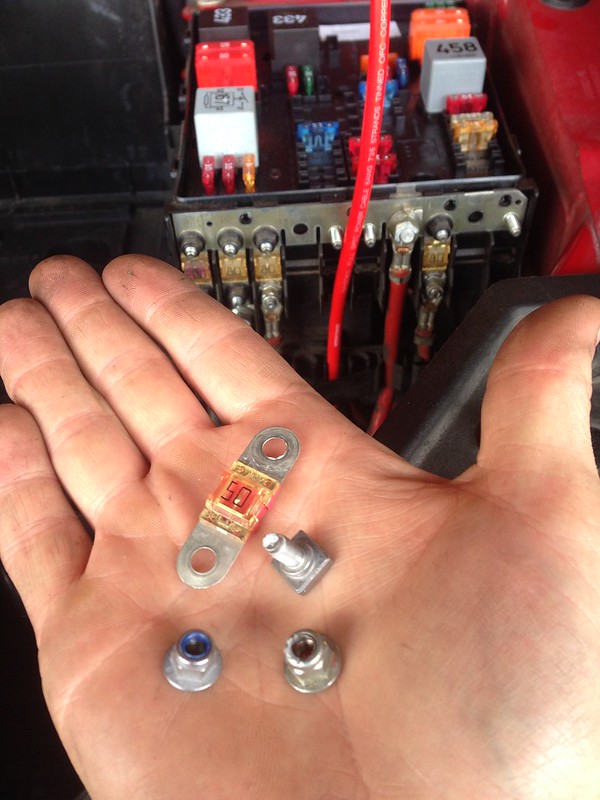
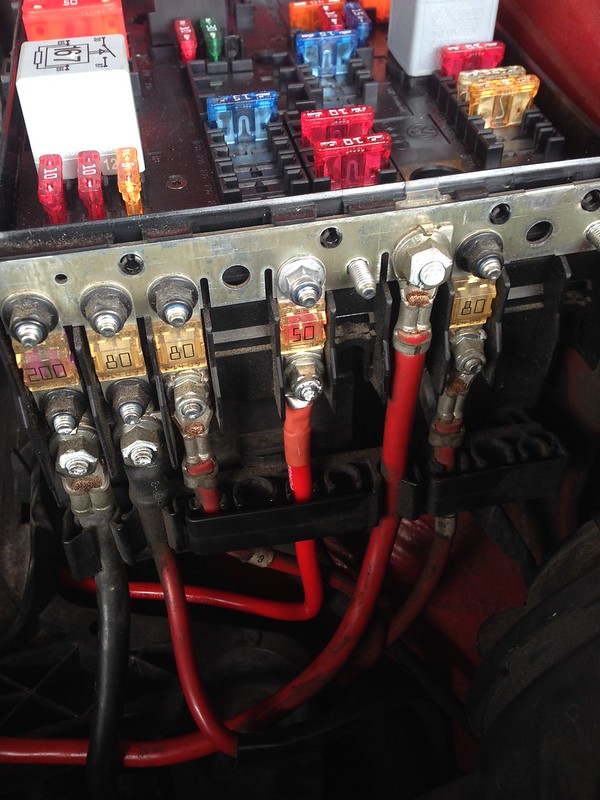
and the power wire fed up along the factory loom and through the rubber grommet in the fire wall to behind the battery. I had already run a tube through here for my boost gauge so at least this step was familiar to me. I also wanted to connect the power wire to the bus bar with a factory fuse for a cleaner look than directly to the battery. I'd seen a few posts on this set-up before and definitely wanted to copy it. I picked up the necessary parts from a wrecker. They even came off a red Mk5 GTI so I couldn't have asked for a more OEM solution ;) The fuse was also a 50 amp which was what the Morel amp recommended.
and bolted it all together:
So, that was the amp installed, and powered:
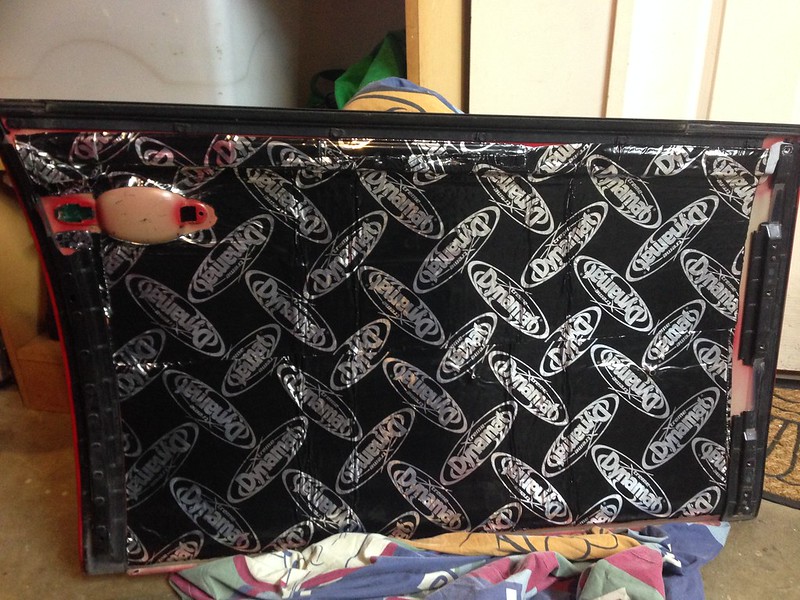
Next step was to install sound deadening to the doors. Fortunately the Mk5 outer door skins can be unbolted making applying the sound deadening simple. I used Dynamat as it was readily available close to my work. Initially I was going to use Stinger brand but it would have been the same price and taken time to deliver and I was keen to get started. I thought I'll do only the left door, then the right door as I can learn on the left before doing the right. That way I can still drive around with no passenger seat and left door card. So I Dynamatted (is that even a word?) the outer skin. I then removed all the wiring loom, grommets, woofer and crossover from the inner skin and Dynamatted that. I re-installed the loom and grommets and then the outer door skin. Hmmm, my door handle wasn't returning properly. Looking up inside the door I could see there is very little clearance behind the recess behind the door handle and the mechanism it bolts to. The Dynamat there was interfering with it's operation so I had to remove the outer door skin and trim back the Dynamat there. Doh!

Of course nothing was going to be straight forward installing different speakers and crossovers, but I knew that going in so was prepared to make what was needed. Measured up existing mounting points and bolt patterns for the new speakers and set about making some adaptor spacers.
Mid adaptors:
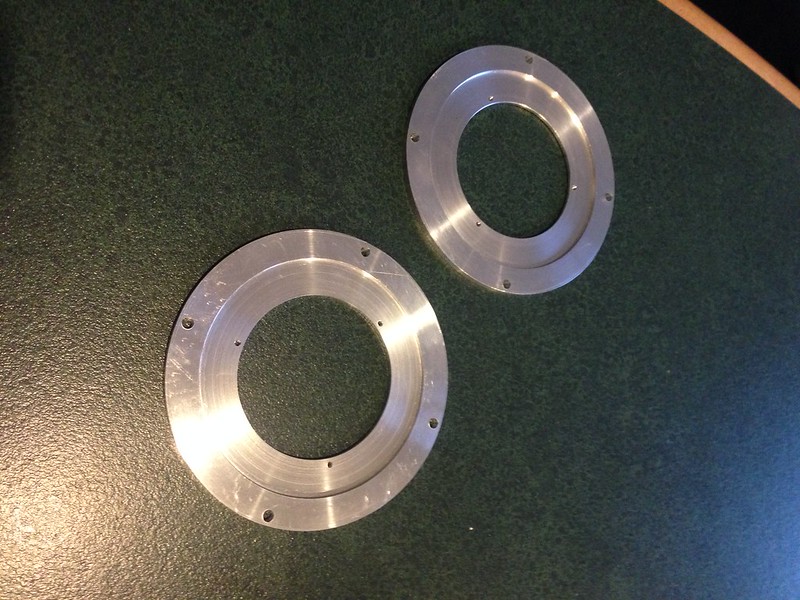
Woofer adaptors coming along nicely:
and complete:

That's about as far as I've got so far. I didn't have all the stainless steel bolts to bolt the adaptors and speakers on so that will probably happen tomorrow. I'm still waiting for my Stinger RCA leads and Audio Control line out converter to arrive too. Hopefully I'll finish all this next weekend.
After all this work and money it better sound good ::)

